Reverse Engineering A Hunter Pro HC Controller
This is the final part of the Hunter Hacking series
All right, it's been a long journey, let's take a quick survey:
-
A Look Inside A Hunter Pro-HC Controller
Here we discovered the Hunter Pro-HC Irrigation controller uses the Microchip ATWINC1500 IoT module as part of its architectural design. We also learned that the controller communicates with backend services on Amazon using MQTTS on port 8883.
-
ATWINC1500 IoT Module Deep-Dive (Part 1)
Here we learned that the ATWINC1500 has easily accessible debug interfaces which allow firmware extraction. We also learned that the module stores Root CA certificates in its Root Cert Store and TLS certificates in its TLS Server Store.
-
ATWINC1500 IoT Module Deep-Dive (Part 2)
Here we modify the Microchip-supplied ATWINC1500 tools to allow dumping and modification of the Root Cert Store and TLS Server Store contents.
-
Here we learn about intercepting traffic between ATWINC1500-based IoT devices and Amazon AWS IoT.
-
Here we actually intercept traffic between an ATWINC1500-based IoT device and Amazon AWS IoT.
In this final series of articles, we will try to actually man-in-the-middle the Hunter Pro-HC Irrigation Controller and integrate it with Home Assistant.
Firmware Extraction
Microchip PIC32MX
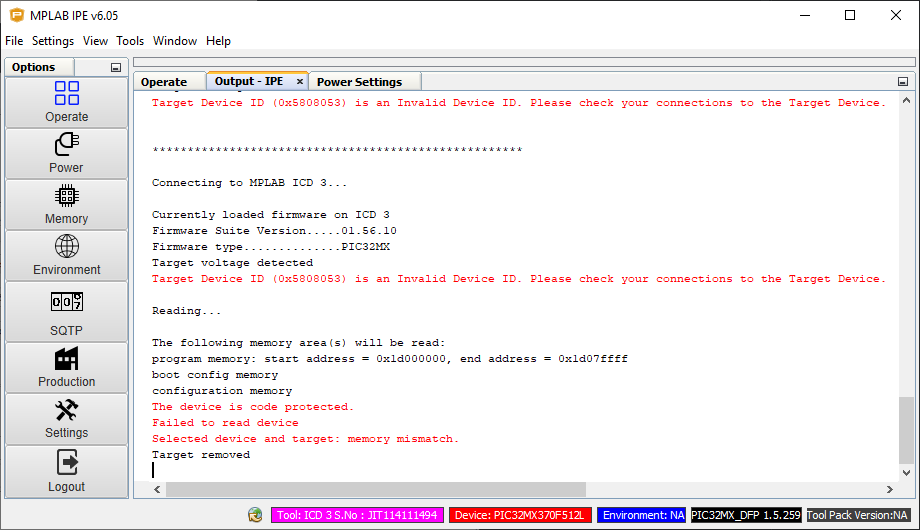
The microcontroller is code protected:
Microchip ATWINC1500
The first thing we'll need to do is dump the Hunter Pro-HC's firmware so we can extract the device's private key and certificate.
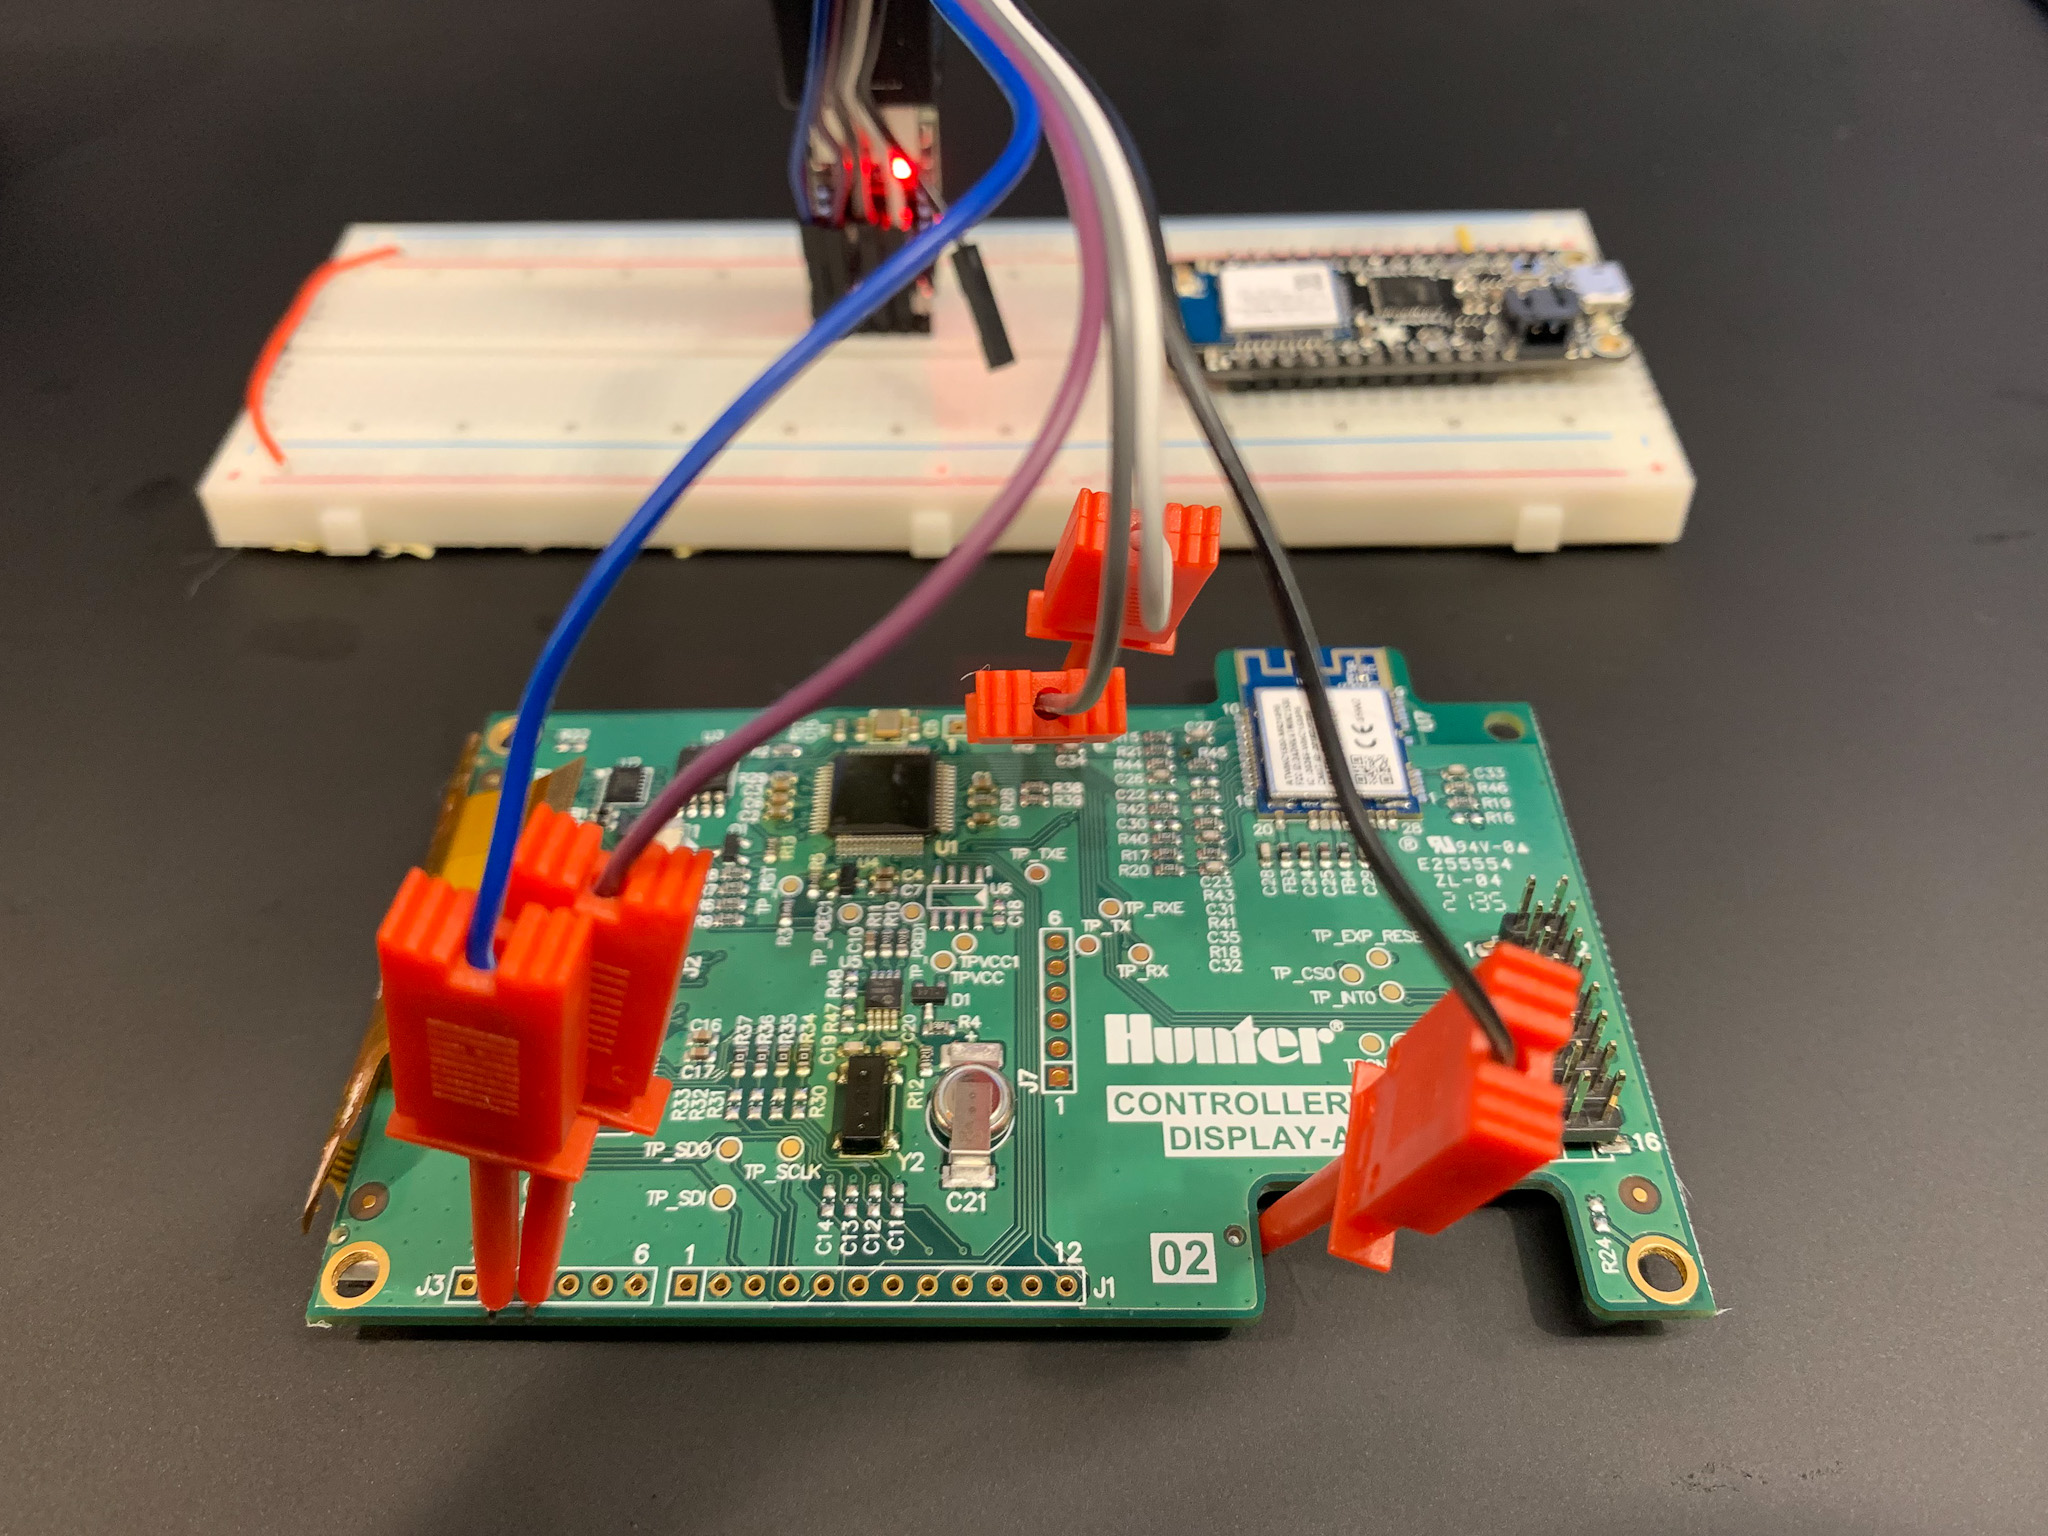
Hardware Setup
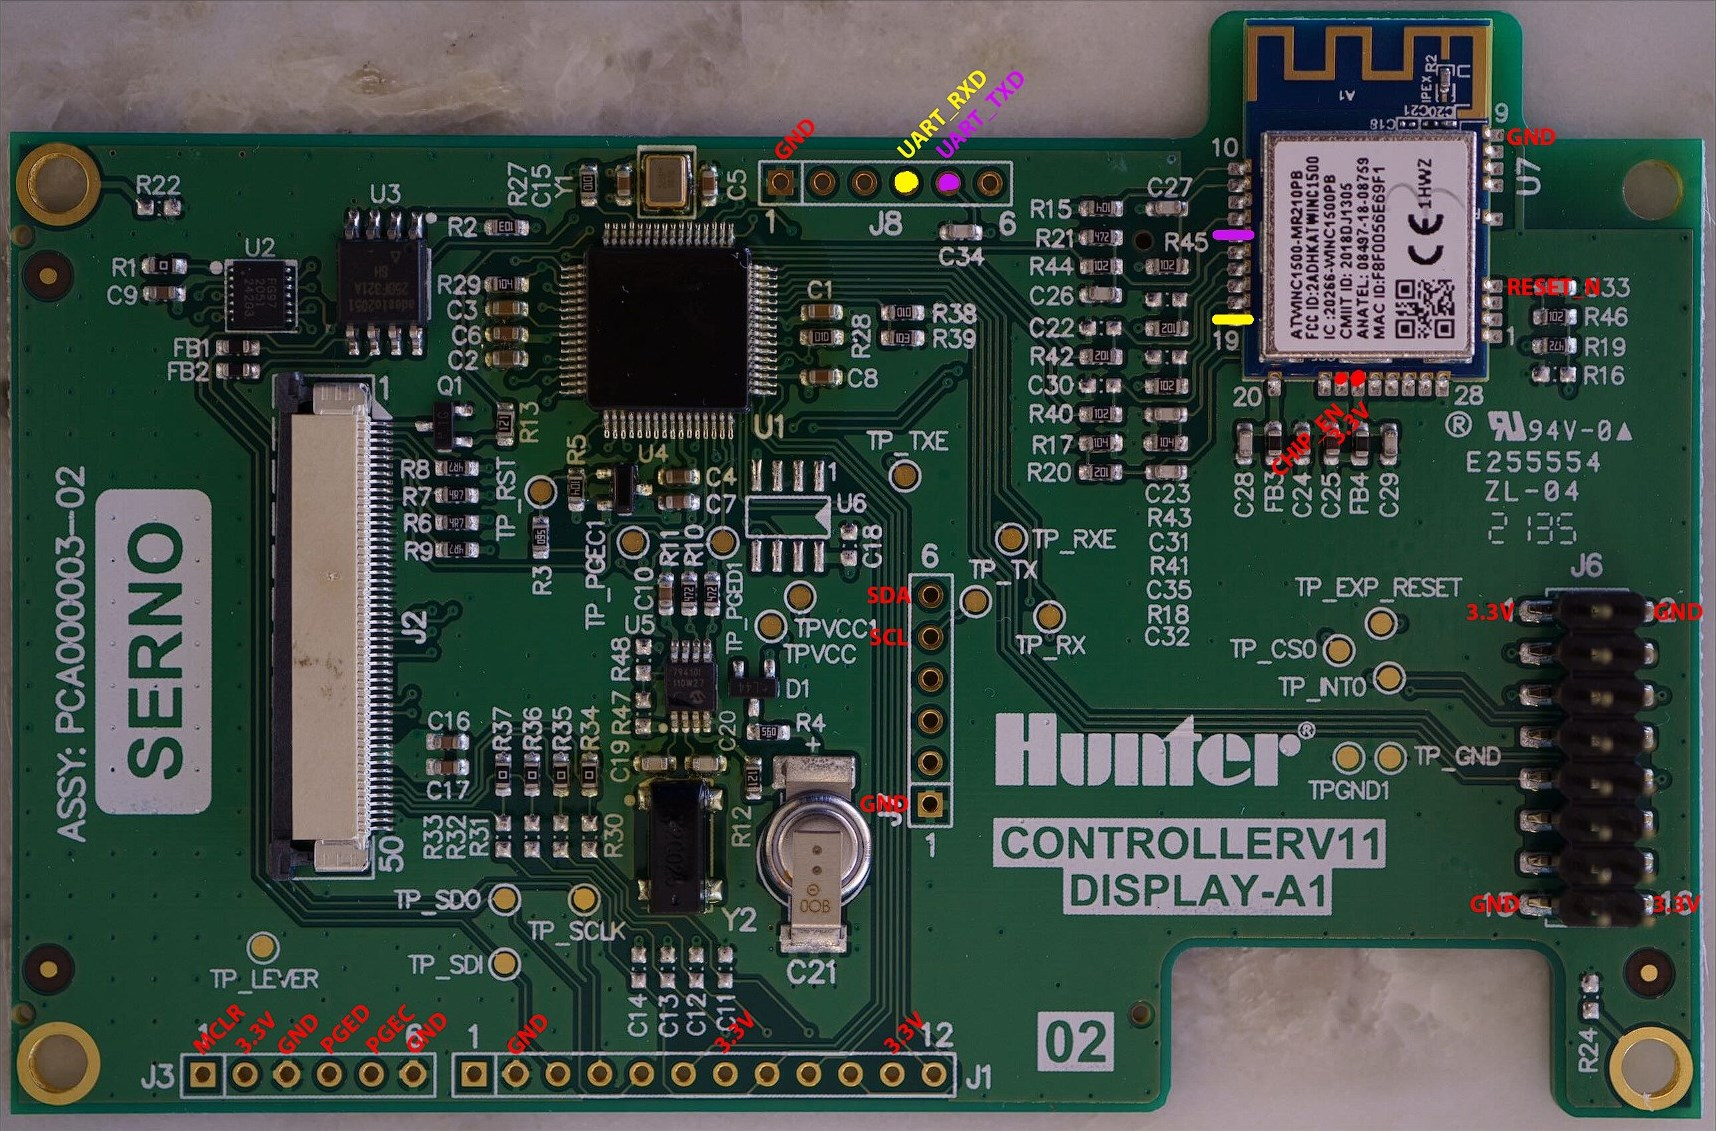
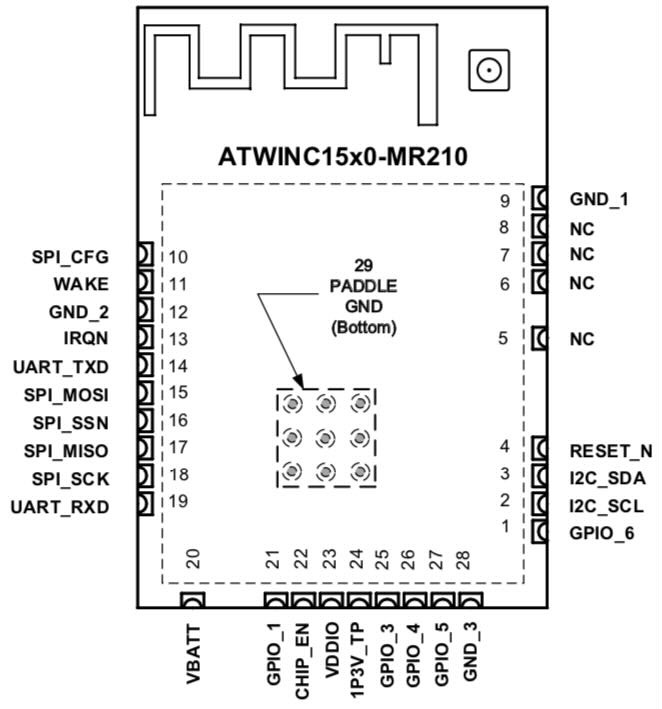
I'm going to use the same steps we used in Firmware Extraction with the board outs from Board Outs.
Tie the MCLR to 3.3V and power up the board.
Executing Dump
$ winc_programmer_uart.exe -p COM4 -d winc1500 -r -pfw programmer_firmware.bin -o atwinc1500-hunter.bin
WINC Programming Tool 2.0.1 [ceebe5f] (Apr 20 2022)
Copyright (C) Microchip Technology Inc. 2022

hardware WINC serial bridge found
chip ID is 0x001503a0
programming firmware file: programmer_firmware.bin
reinitialise onchip uart to 500000
waiting for firmware to run
flash ID 0xc21320c2
flash size is 4 Mb

begin read operation

 0x000000:[rrrrrrrr] 0x008000:[rrrrrrrr] 0x010000:[rrrrrrrr] 0x018000:[rrrrrrrr]
 0x020000:[rrrrrrrr] 0x028000:[rrrrrrrr] 0x030000:[rrrrrrrr] 0x038000:[rrrrrrrr]
 0x040000:[rrrrrrrr] 0x048000:[rrrrrrrr] 0x050000:[rrrrrrrr] 0x058000:[rrrrrrrr]
 0x060000:[rrrrrrrr] 0x068000:[rrrrrrrr] 0x070000:[rrrrrrrr] 0x078000:[rrrrrrrr]

output file format not specified, assuming 'raw'
Having trouble?
It took me a ~15 tries to get the dump to work. Here are some tips: - Make sure you're powering the board with 3.3V - Make sure you're supplying enough power to the board - Try disconnecting the display flex cable - Try manually trying the ATWINC1500 RESET_N pin high - Pray
Firmware Analysis
We can now dump the Root Cert Store and TLS Server Store contents using:
$ atwinc1500_fwtool.exe read atwinc1500-hunter.bin -o output-hunter

Dumping TLS Store contents...
- TLS Certificate Store Loaded Successfully From: Firmware Image
Found 3 entries...
- RSA Certificate Chain File List
  NAME                                             SIZE TYPE         INFO
  PRIV_00ecf54963945448ad3fe767799ed084f6b2befda4  1208 PRIVATE KEY
  CERT_00ecf54963945448ad3fe767799ed084f6b2befda4   862 CERTIFICATE  AWS IoT Certificate
- Private Key Details:
  Modulus (N) :(015430B4)(256)
        D1 CD 2B BD DA A8 2E 05 E3 DA D6 1A D0 B9 8E 50
        06 DB 67 E1 E2 74 64 0A E0 82 88 89 C5 06 BA C8
        EB 4B A0 1D 99 68 85 CE 16 E0 A9 8C 9E 02 11 70
        F9 72 70 D1 C4 2A 31 A8 BA 99 82 94 5F 3B F8 1C
        81 FB 27 69 02 2B DF 6A 5F 31 46 80 FE 87 32 DF
        54 96 B2 12 F6 F6 B4 B2 CB 9E EA 45 E4 1A A6 DF
        AB 93 25 27 C0 77 F0 6C AF C5 40 42 90 87 EE 7F
        0C DD F8 BC 78 CE 79 C6 B5 91 50 63 6E B6 8D 3D
        A4 6D E2 3D 9A 84 ED 39 BB A9 04 ED 6E 34 22 0E
        F3 F4 2C 14 EB CD 94 2A 99 D9 D7 F3 73 3D 16 BD
        25 20 B4 84 89 4D 47 3F E7 F4 E8 DA A4 E0 41 05
        CB C6 7F 42 C6 18 BA EC 33 56 12 16 7F A4 38 E4
        96 00 13 13 4D DF 23 9F D4 FD 4E 21 BA B7 8A 6B
        5B 44 FF 37 62 30 B6 97 00 EA CD 2E 52 93 EF 51
        85 F6 8B B3 E0 4D 97 9E 87 BE E9 DB C4 89 84 E6
        90 88 80 D5 18 71 21 84 5E 92 41 46 4B 70 42 55

Dumping Root Cert Store contents...
- Root Certificate Store Loaded Successfully From: Firmware Image
- Found 3 entries:
1) RSA Certificate: 11/8/2006 [00:00:00] to 7/16/2036 [23:59:59]
   Name Hash (SHA1): B8 0D 5E D3 51 52 3F ED 85 37 20 A0 AC C0 DC 13 77 BE 16 0C
2) RSA Certificate: 5/26/2015 [00:00:00] to 1/17/2038 [00:00:00]
   Name Hash (SHA1): A8 66 80 C4 56 27 2E AF E3 A7 CE 2E 49 D1 31 DC 65 BB B1 ED
3) RSA Certificate: 5/26/2015 [00:00:00] to 5/26/2040 [00:00:00]
   Name Hash (SHA1): 1A 49 C7 63 82 3A 9E 3F 53 2D F1 BA 1F BF 7E B0 13 0F BB 1A
Which results in:
$ tree -a -L 3
.
├── RSA_AWS IoT Certificate.cer
├── private-key.asn1
├── private-key.bat
├── public-key.bat
├── public-rsa-cert-01.asn1
├── public-rsa-cert-02.asn1
└── public-rsa-cert-03.asn1
It looks like we have the device's private key named private-key and certificate named RSA_AWS IoT Certificate.cer.
Spidey senses tingling? Yep, feels familar: Hands On IoT MitM (Part 1)#3. Basic MQTTS Connection.
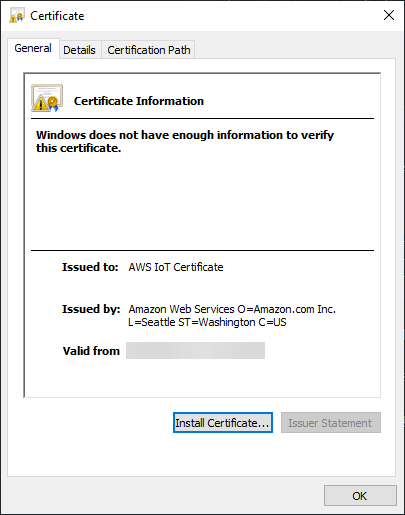
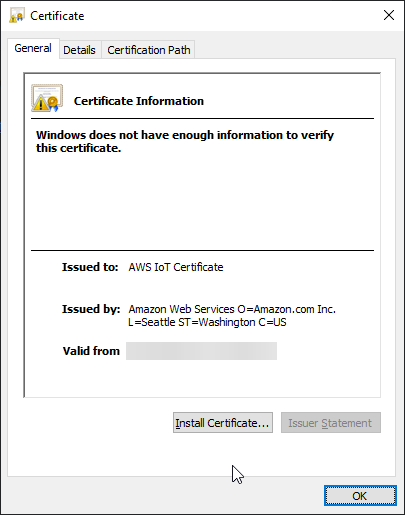
Here's what the two look like side-by-side:
At this point, we can be 99% certain that the Hunter Pro HC is using vanilla AWS IoT as its backend service.
Is this legal?
IANAL, so I'll only speak to technical aspects, but having the private key and certificate in no-way gives us, or our Hunter Pro-HC controller, any "more" access to Hunter's AWS IoT backend services than we had before we extracted them.
Convert:
Production Dry-Run
Now that we're at the precipice of MitM'ing our Hunter Pro-HC, it's worth doing a dry-run of what we're going to be doing to our device:
- Starting from Hands On IoT MitM (Part 1)#IoT Device Setup, we will start with "IoT Device" which connects directly to Amazon IoT.
- We will extract the contents of the Root Cert Store and TLS Server Store
- We will use the extracted AWS IoT private key, certificate, and Root CA certificate to configure IOXY
- We will generate and burn the IOXY verification certs to the Root Cert Store and TLS Server Store
- We will confirm that the device connects to AWS IoT
Stage Device With AWS IoT Certs
- Upload SerialBridge sketch to device
-
Clear out the device
-
Upload AWS IoT certs
# Write AWS IoT private key and certificate to TLS Server Store $ atwinc1500_fwtool.exe update --tls --key connect_device_package\feathermitm.private.key --cert connect_device_package\feathermitm.cert.pem # Write AWS Root CA cert to Root Cert Store $ atwinc1500_fwtool.exe update --root --ca_dir connect_device_package -
Confirm AWS IoT Connectivity using AWS_IoT_WiFi sketch
Validate Cert Extraction Process
- Upload SerialBridge sketch to device
-
Extract certificates
-
Examine the certificates
Note
RSA_AWS IoT Certificate.cer is the AWS IoT device cert.
-
Convert certificates to
.derbash $ cd output-dryrun $ private-key.bat $ public-key.bat
Confirming the conversion worked:
```bash
$ ls -l

private-key.asn1
private-key.bat
private-key.der
private-key.pem
public-key.bat
public-rsa-cert-01.asn1
public-rsa-cert-01.der
'RSA_AWS IoT Certificate.cer'
```
Info
public-rsa-cert-01.der is essentially useless, but does contain the public key of the certs in the Root Cert Store. The Root Cert Store actually strips out most of the content of the Root CA certificates that are inserted into it, keeping only the public key.
Confirm Extracted Certificates
-
Clear out the device
-
Upload extracted AWS Certs
```bash $ atwinc1500_fwtool.exe update --tls --key output-dryrun\private-key.pem --cert output-dryrun\"RSA_AWS IoT Certificate.cer"
$ atwinc1500_fwtool.exe update --root --ca_dir connect_device_package ```
-
Confirm AWS IoT Connectivity using AWS_IoT_WiFi sketch
Validate IOXY Setup
- Upload SerialBridge sketch to device
-
Upload IOXY RootCA certificate
certscontainsrootCA.cerwhich is generated by the IOXYgenCert.shscript.We use the
--eraseflag to clear out the Root Cert Store before uploading the cert.What's interesting is that we don't have to actually replace the device AWS private key and certificate, all we have to do is add the self-signed IOXY Root CA certificate to the Root Cert Store.
$ atwinc1500_fwtool.exe read

Dumping TLS Store contents...
TLS Certificate Store Loaded Successfully From: Flash
Found 3 entries...
- RSA Certificate Chain File List
  NAME                                             SIZE TYPE         INFO
  PRIV_62a1f32e421df7f65e2290155189f76dbd6953bd    1208 PRIVATE KEY
  CERT_62a1f32e421df7f65e2290155189f76dbd6953bd     861 CERTIFICATE  AWS IoT Certificate
- Private Key Details:
  Modulus (N) :(00E09DA4)(256)
        A9 34 C5 DD 7F 50 C2 23 90 AA 85 5B DA EC 23 80
        09 AB E7 B8 1E 1F 66 1C 37 9E 3A 28 BB 9D 07 6C
        AE D9 50 5C 45 D8 F1 5A 09 4A 44 A1 56 1F A6 41
        4C B4 20 2D D9 0F 78 68 E7 6E 11 61 94 54 70 13
        DF A0 86 38 BC 0F 9E 09 B0 04 39 53 F2 29 35 BF
        8E FA 19 97 86 40 74 3C 20 79 B9 0F 2A 1E 7A 01
        F5 55 C2 BB CE F6 7A AA 14 48 BB 77 92 AB 0E 6D
        C2 FE 6C 62 F6 DD 76 90 63 40 C8 58 2F 4F D6 B1
        87 09 CF C7 40 34 24 E7 26 C1 BB 29 F5 45 C1 7D
        75 4D 79 4A C0 F7 78 FA EA 7F 3F 44 DA F8 BE D0
        17 3D 9E FF 0C BF F9 B6 C4 06 5F 12 88 7C C2 9F
        B8 82 D3 E2 21 A9 73 72 AC 09 9B 2B 4F 91 8A 2D
        E6 5F A0 83 73 82 56 5D 4E 6C 85 A9 43 87 74 81
        2A B3 47 D5 E2 18 F8 39 FC 66 1A 5B D2 C4 06 24
        CC 4C 0E BF 49 2A 90 3D 0F 47 12 16 52 F0 5E B7
        4A 3E F4 76 02 6E 64 C0 16 0B 14 A7 93 90 58 99

- TLS Certificate Details:
    Subject <AWS IoT Certificate>
    Issuer  < >
    <2023-03-23 12:47:18> to <2049-12-31 23:59:59>

Dumping Root Cert Store contents...
Root Certificate Store Loaded Successfully From: Flash
Found 3 entries:
1) RSA Certificate: 5/26/2015 [00:00:00] to 1/17/2038 [00:00:00]
   Name Hash (SHA1): A8 66 80 C4 56 27 2E AF E3 A7 CE 2E 49 D1 31 DC 65 BB B1 ED
2) RSA Certificate: 3/19/2023 [20:00:22] to 3/18/2033 [20:00:22]
   Name Hash (SHA1): 14 65 65 22 40 7A D1 30 64 06 9E 87 AD BB C5 31 7D 37 94 FF
3) RSA Certificate: 3/24/2023 [04:48:33] to 1/11/2026 [04:48:33]
   Name Hash (SHA1): 85 E9 39 C3 32 E4 60 1F 7E 69 9A 5F 49 99 76 39 FC BB D9 87
- Confirm AWS IoT Connectivity using AWS_IoT_WiFi sketch
It works!
