Hands On IoT MitM (Part 2)
If you haven't read Hands On IoT MitM (Part 1), you really should
Ok, so where were we... we've got our little "IoT Device" Googling over SSL, Googling over SSL through mitmproxy, chatting away with AWS IoT over MQTT, and IOXY is setup and ready to transparently proxy its messages to AWS IoT.
So the final bit seems pretty easy, we just need to flash some certs and figure out how to get IOXY to intercept our traffic.
Let's start with the latter.
4. MitM'd MQTTS Connection
For the final piece of this saga, we're going to want to intercept our humble hello messages, as they leave our "IoT Device" and make their way to AWS IoT.
To do this, we'll going to use IOXY, an " MQTT intercepting proxy", which IOXY plays the role of mitmproxy from our Basic SSL Connection example.
Conveniently, IOXY comes with an AWS PubSub example, which is worth reading through to get familiar with the tool.
IOXY Setup
Check the code out from my repo: peddamat/IOXY (my fork includes fixes not yet in upstream)
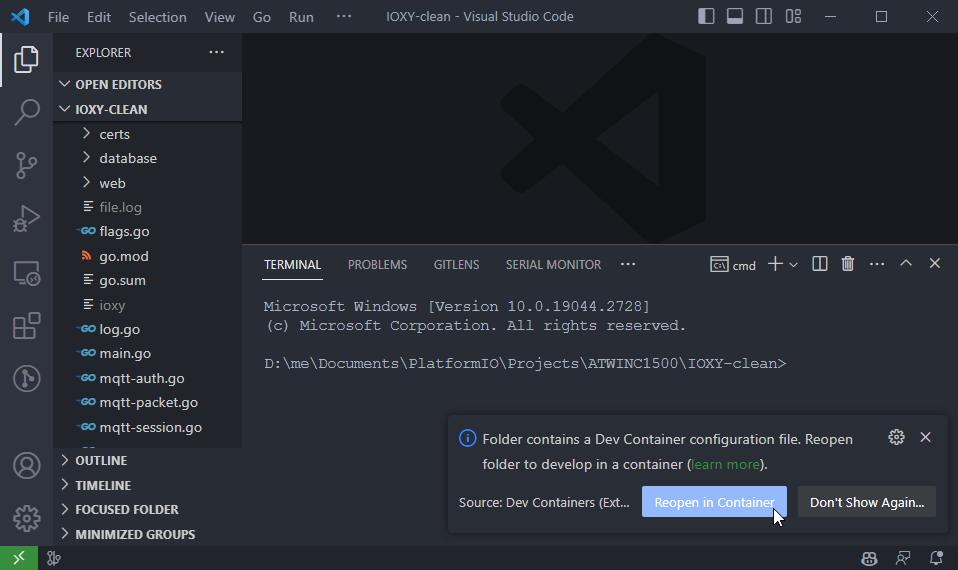
Open it in Visual Studio Code. When prompted to "Reopen in Container", please do so:
Building
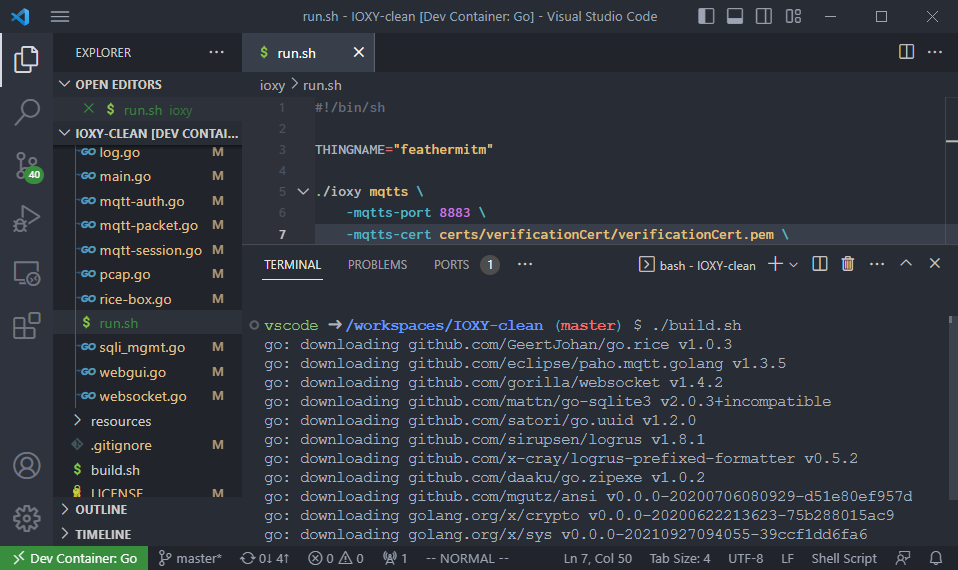
Open a VSCode terminal and type ./build.sh:
Which places the binary in ioxy\ioxy.
Cert Setup
Unlike mitmproxy, we have to fiddle with certificates to get things working. If you recall, we're using mTLS, which means that our "IoT Device" has a private key and certificate.
For IOXY to serve as an intermediary, it's going to need to use those, itself, to connect to AWS IoT.
Conversely, IOXY will need to present an endpoint to our "IoT Device", so IOXY needs its own Root CA certificate, and the device needs a new private key and certificate combo.
Client-Side Certs
IOXY comes with the ioxy/certs/genCerts.sh script, which generates a self-signed Root CA certificate and device certs:
#!/bin/sh

DEVICE_NAME="d1"

# create directories if needed
mkdir -p "./ca"
mkdir -p "./devices/$DEVICE_NAME"
mkdir -p "./verificationCert"

# generate root key
echo "=============------------============"
echo "[+] Generating Root cert"
echo "=============------------============"
echo ""
cd "./ca"
openssl genrsa -out rootCA.key 2048 && openssl req -x509 -new -nodes -key rootCA.key -sha256 -days 1024 -out rootCA.pem
cd ..

# generate verification cert
echo ""
echo "=============------------============"
echo "[+] Generating Verification cert"
echo "=============------------============"
echo ""
cd "./verificationCert"
openssl genrsa -out verificationCert.key 2048 && openssl req -new -key verificationCert.key -out verificationCert.csr && openssl x509 -req -in verificationCert.csr -CA ../ca/rootCA.pem -CAkey ../ca/rootCA.key -CAcreateserial -out verificationCert.pem -days 500 -sha256
cd ..

# generate device cert
echo ""
echo "=============------------============"
echo "[+] Generating Device cert"
echo "=============------------============"
echo ""
cd "./devices/$DEVICE_NAME"
openssl genrsa -out $DEVICE_NAME.key 2048 && openssl req -new -key $DEVICE_NAME.key -out $DEVICE_NAME.csr && openssl x509 -req -in $DEVICE_NAME.csr -CA ../../ca/rootCA.pem -CAkey ../../ca/rootCA.key -CAcreateserial -out $DEVICE_NAME.pem -days 500 -sha256

echo ""
echo "=============------------============"
echo "[+] Done!"
echo "=============------------============"
echo ""
Running the genCerts.sh script...
$ ./genCerts.sh
=============------------============
[+] Generating Root cert
=============------------============
...
... generates the following:
$ tree
.
...
├── ca
│   ├── rootCA.key
│   ├── rootCA.pem
│   └── rootCA.srl
├── devices
│   └── d1
│       ├── d1.csr
│       ├── d1.key
│       └── d1.pem
└── verificationCert
    ├── verificationCert.csr
    ├── verificationCert.key
    └── verificationCert.pem
Info
Rename rootCA.pem to rootCA.cer!
Server-Side Certs
We need the Amazon-provided certificates to be handy, so copy the connect_device_package into ioxy\certs:
$ tree
.
...
├── ca
│   ├── rootCA.key
│   ├── rootCA.pem
│   └── rootCA.srl
├── connect_device_package
│   ├── aws-iot-device-sdk-python-v2
│   ├── feathermitm-Policy
│   ├── feathermitm.cert.pem
│   ├── feathermitm.private.key
│   ├── feathermitm.public.key
│   ├── root-CA.crt
│   └── start.sh
├── devices
│   └── d1
│       ├── d1.csr
│       ├── d1.key
│       └── d1.pem
├── genCerts.sh
└── verificationCert
    ├── verificationCert.csr
    ├── verificationCert.key
    └── verificationCert.pem
Usage
IOXY can be started using the run.sh script.
Before running it, be sure to update the ENDPOINT and THINGNAME:
#!/bin/sh

ENDPOINT="xxx-ats.iot.us-west-2.amazonaws.com"
THINGNAME="feathermitm"

./ioxy mqtts \
    -mqtts-port 8883 \
    -mqtts-cert certs/verificationCert/verificationCert.pem \
    -mqtts-key certs/verificationCert/verificationCert.key \
    broker \
    -mqtt-broker-tls \
    -mqtt-broker-host ${ENDPOINT} \
    -mqtt-broker-port 8883 \
    -mqtt-broker-cert certs/connect_device_package/${THINGNAME}.cert.pem \
    -mqtt-broker-key certs/connect_device_package/${THINGNAME}.private.key
Then run the script:
$ ./run.sh

Log Level Set To : info
[...]  INFO auth : no auth url configured : bypassing!
[...]  INFO Starting ioxy
[...]  INFO MiTM Broker Settings | Mode : mqtts | Host : 0.0.0.0 | Port : 8883
[...]  INFO Distant Broker Settings | Host : xxx-ats.iot.us-west-2.amazonaws.com | Port : 8883
[...]  INFO Broker Misc | Payload Intercept : disabled
[...]  INFO mqtts: listening on mqtts://0.0.0.0:8883
Testing
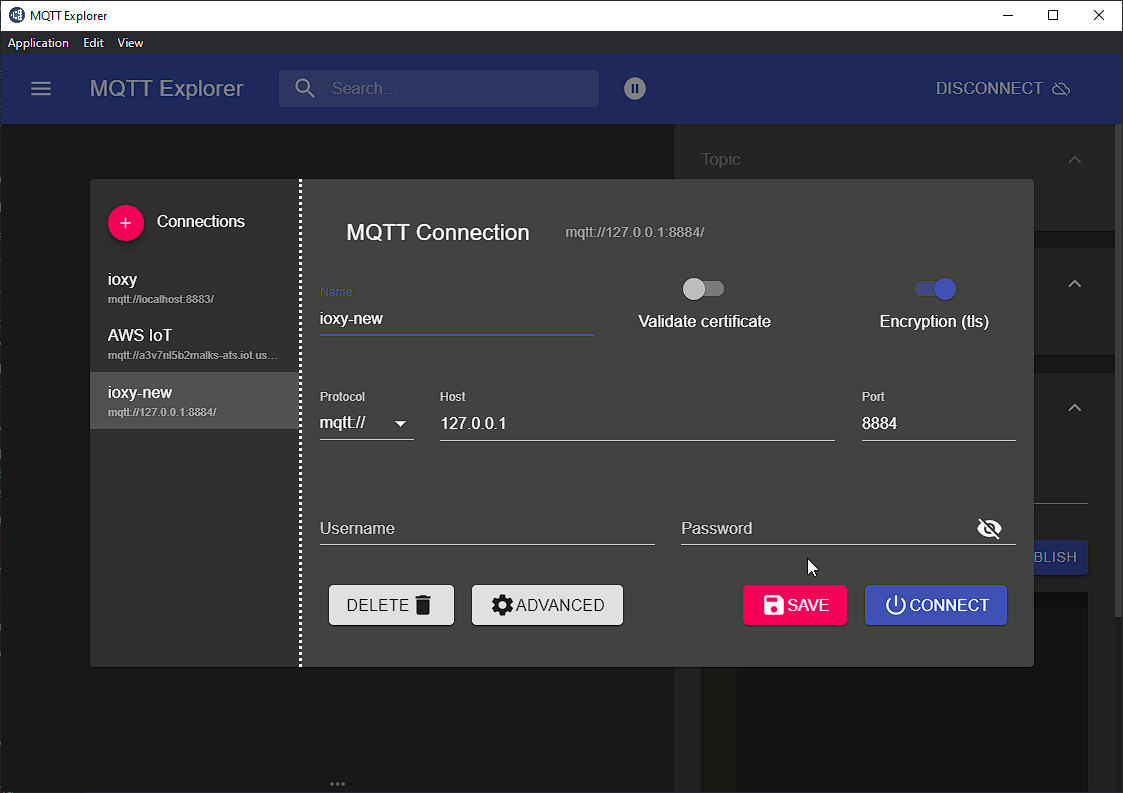
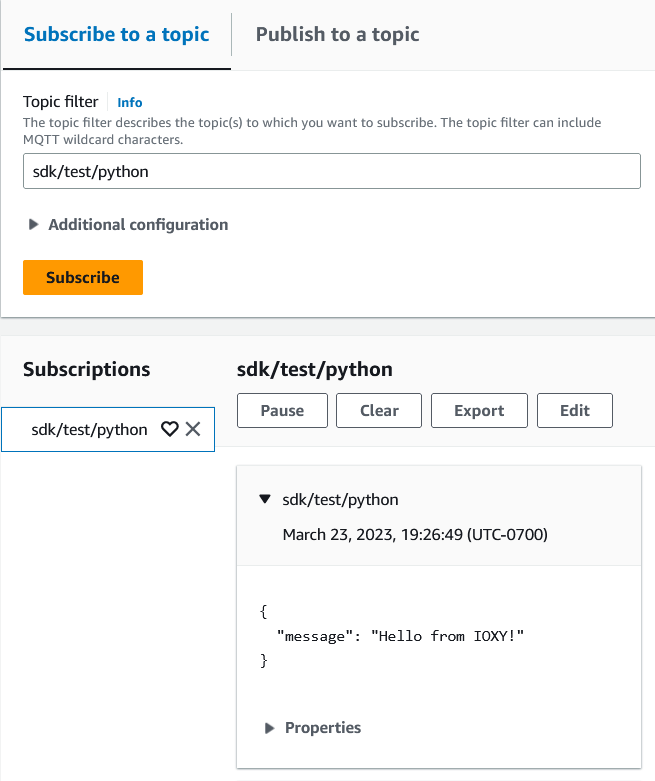
Now that we have IOXY setup, let's make sure it's configured properly.
Once we're comfortable that things are working, we can get our Adafruit Feather M0 connected.
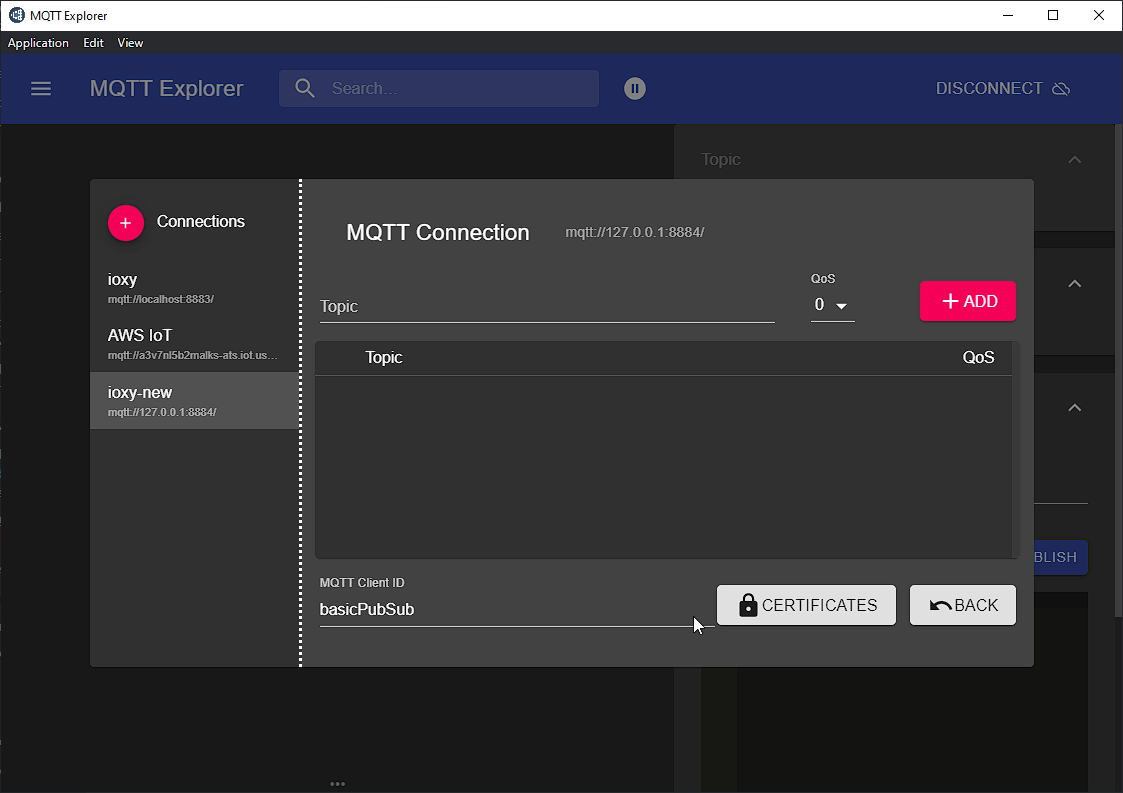
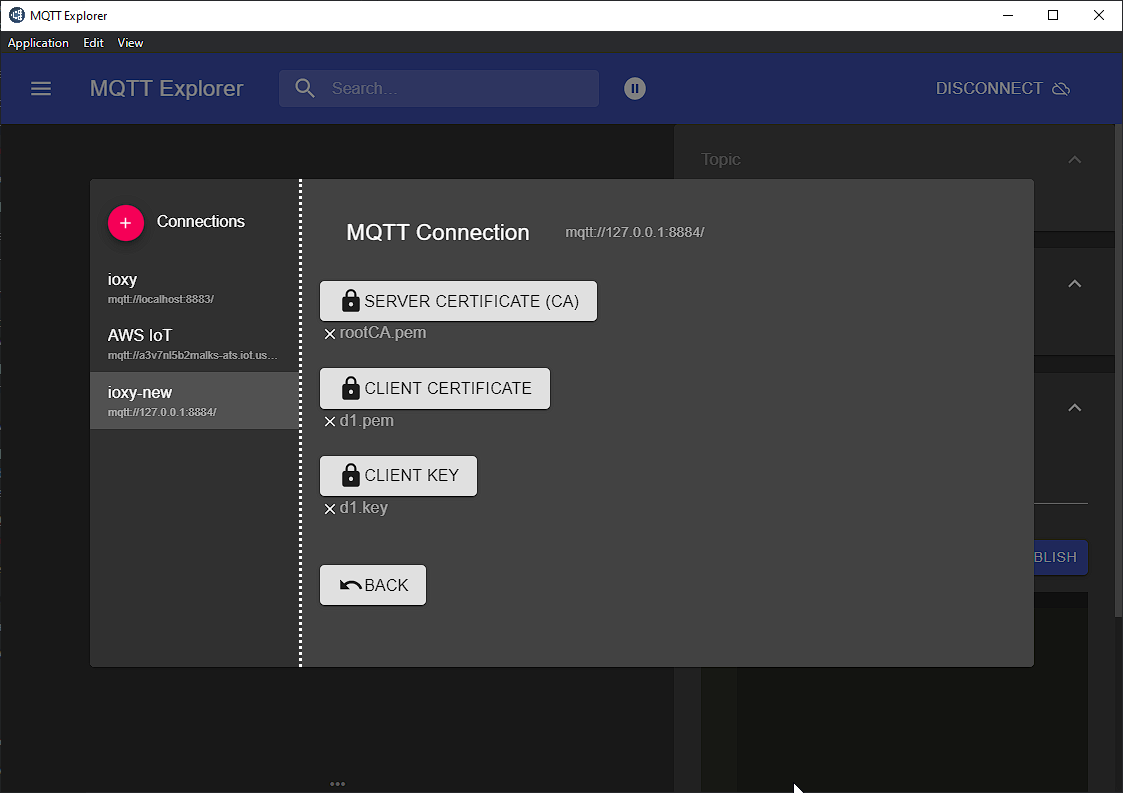
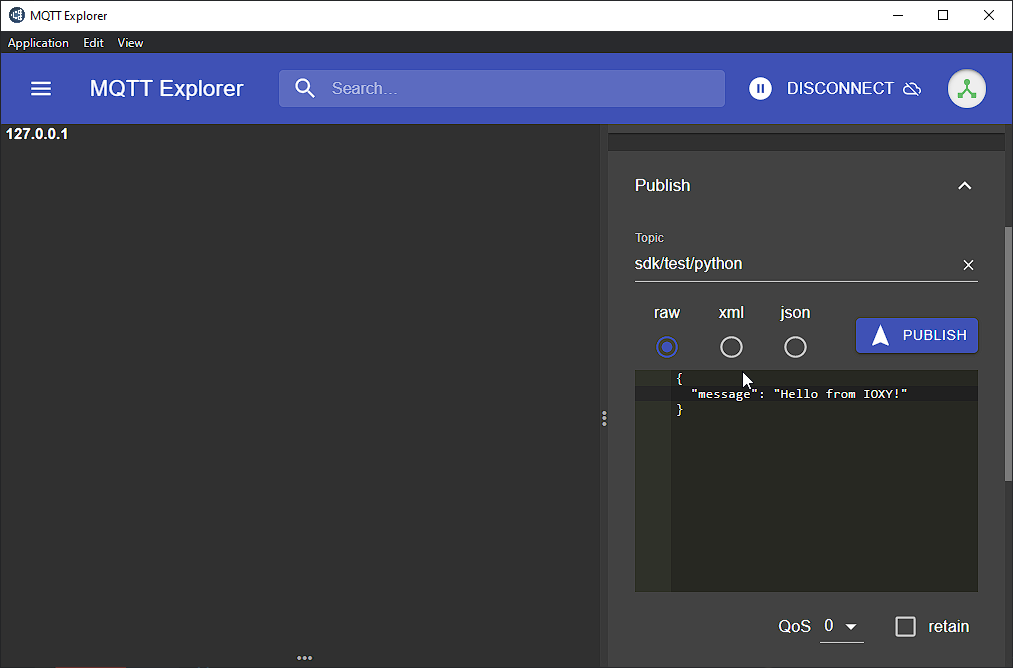
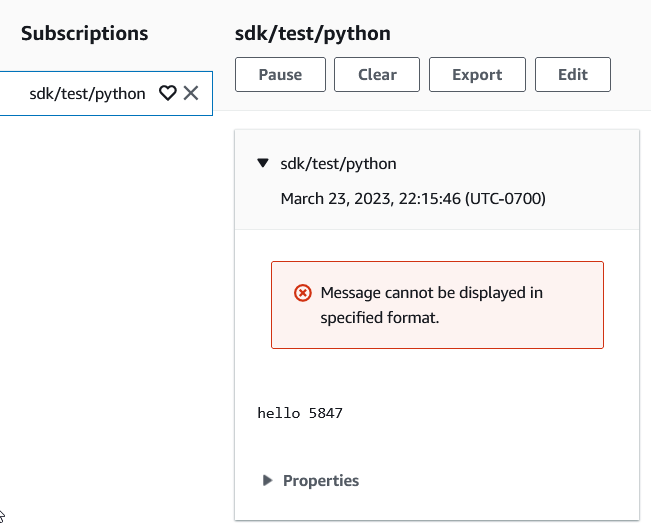
To do this we can use the handy dandy MQTT Explorer:
MQTT Explorer
Awesome!
Intercepting Traffic
There are a few ways to accomplish this:
- Update the damn code
-
Use DNS-based attack
This is a good choice if we don't have access to the device's source code, and have admin of the network. To do this we'll need to:
- Need to serve spoofed IP address to device
- Need to intercept the device's hard-coded DNS server
-
Use routing-based attack
This is a good choice if we don't have access to the device's source code, have admin of the network, and don't want to mess with DNS. To do this we'll need to:
- Modify network route to route traffic from IoT device to IOXY
-
Use wireless man-in-the-middle attack
This choice works if you don't have access to the device source and you don't have control of the network. To do this we'll need to:
- Setup a bridged MitM proxy.
- Reconfigure device to connect to MitM SSID.
1. Updating The Damn Code
Of course, this is the simplest way to convince our device to connect to our IOXY proxy. If we have access to the device and to the device's source code, it's a trivial matter to... well, let's just do it.
Arduino Setup
Load the AWS_IoT_WiFi sketch and update the SECRET_BROKER in your arduino_secrets.h, pointing it to the IP address of the machine running IOXY:
// Fill in  your WiFi networks SSID and password
#define SECRET_SSID ""
#define SECRET_PASS ""

// Fill in the hostname of your AWS IoT broker
//#define SECRET_BROKER "xxx-ats.iot.us-west-2.amazonaws.com"
#define SECRET_BROKER "172.16.1.172"
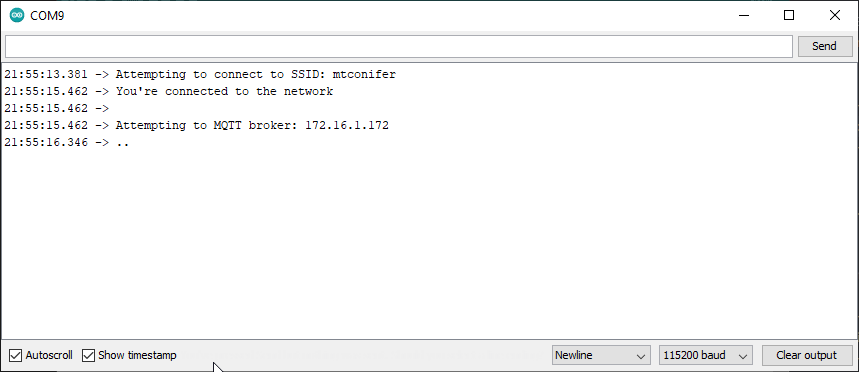
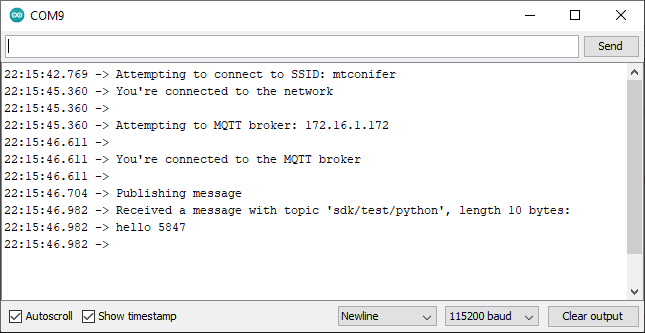
Upload and run the sketch, and...
The IOXY logs only state that the client has closed the connection:
vscode@ec86a37648ea:/workspaces/IOXY/ioxy$ ./run.sh
Log Level Set To : info
[...]  INFO auth : no auth url configured : bypassing!
[...]  INFO Starting ioxy
[...]  INFO MiTM Broker Settings | Mode : mqtts | Host : 0.0.0.0 | Port : 8883
[...]  INFO Distant Broker Settings | Host : xxx-ats.iot.us-west-2.amazonaws.com | Port : 8883
[...]  INFO Broker Misc | Payload Intercept : disabled
[...]  INFO mqtts: listening on mqtts://0.0.0.0:8883
[...]  INFO New client connected
[...] ERROR Session 43b29e53-a4e2-4452-9cb4-eb37f639a413 > - Error reading MQTT packet
[...]  INFO The client may have closed the connection
...
So, what's happening here? The error message seems very similar to the mitmproxy error we experienced back in Hands On IoT MitM (Part 1)#2. MitM'd SSL Connection.
When we last touched the device, we'd just finished uploading the Amazon Root CA certificate to the device's Root Cert Store.
Now, when we configured IOXY, genCerts.sh generated a Root CA certificate for IOXY, which it used to sign the device's verification cert.
Let's see what happens when we add IOXY's Root CA certificate to the device's Root Cert Store.
Prepare Root Cert Store
First, erase the Root Cert Store:
$ atwinc1500_fwtool.exe erase --root
Erasing device...
Detecting COM port...
Root Certificate Store Updated Successfully On: Flash
Check to make sure it worked:
$ atwinc1500_fwtool.exe read
Dumping TLS Store contents...
...
Dumping Root Cert Store contents...
Root Certificate Store Loaded Successfully From: Flash
- Found 0 entries!
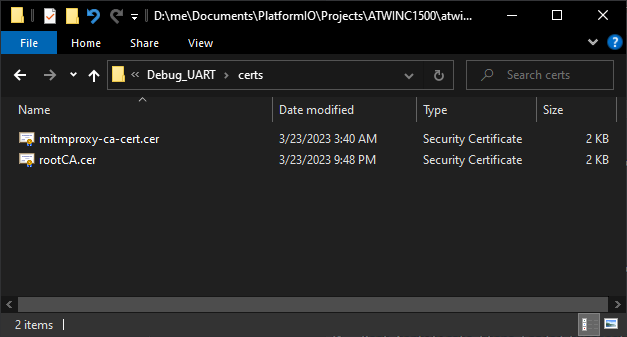
Now, copy over the genCerts.sh generated rootCA.cer to somewhere handy:
Run the update command:
```bash hl_line="22" $ atwinc1500_fwtool.exe update --ca_dir certs TLS Certificate Store Loaded Successfully From: Flash Root Certificate Store Loaded Successfully From: Flash
Found Certificate: mitmproxy
Found Certificate:
Root Certificate Store Updated Successfully On: Flash
Check to make sure *that* worked:

```bash hl_lines="14 16-17 19-20"
$ atwinc1500_fwtool.exe read
Dumping TLS Store contents...
...
Dumping Root Cert Store contents...
Root Certificate Store Loaded Successfully From: Flash
- Found 2 entries!

  Name Hash (SHA1): 14 65 65 22 40 7A D1 30 64 06 9E 87 AD BB C5 31 7D 37 94 FF   Certificate 1: RSA
  <2023-03-19 20:00:22> to <2033-03-18 20:00:22>

  Name Hash (SHA1): 85 E9 39 C3 32 E4 60 1F 7E 69 9A 5F 49 99 76 39 FC BB D9 87   Certificate 2: RSA
  <2023-03-24 04:48:33> to <2026-01-11 04:48:33>
Upload Sketch
Upload and run the sketch:
Checking the IOXY logs:
vscode@ec86a37648ea:/workspaces/IOXY/ioxy$ ./run.sh
Log Level Set To : info
[...]  INFO auth : no auth url configured : bypassing!
[...]  INFO Starting ioxy
[...]  INFO MiTM Broker Settings | Mode : mqtts | Host : 0.0.0.0 | Port : 8883
[...]  INFO Distant Broker Settings | Host : xxx-ats.iot.us-west-2.amazonaws.com | Port : 8883
[...]  INFO Broker Misc | Payload Intercept : disabled
[...]  INFO mqtts: listening on mqtts://0.0.0.0:8883
[...]  INFO New client connected
[...]  INFO New client added to the database
[...]  INFO client > broker | Subscribe | packet : SessionId : ., Topic : sdk/test/python, Dup : false, QoS : 1, Retain : false
[...]  INFO client > broker | Publish | packet : SessionId : ., Topic : sdk/test/python , Payload : hello 5847, Dup : false, QoS : 0, Retain : false
2. Using DNS
Spoofing IP Address
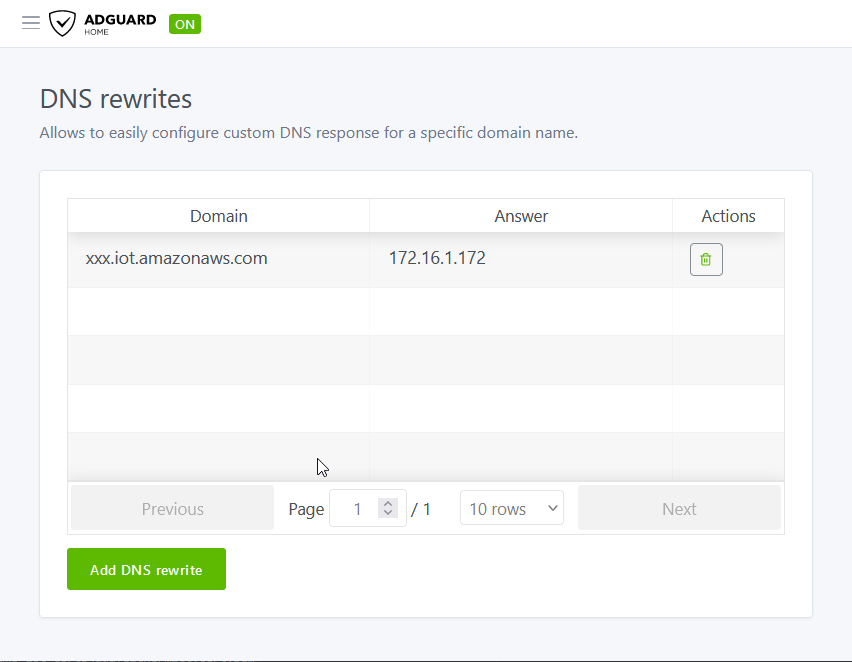
I use AdGuard, which provides an easy way to rewrite DNS:
Confirming things are working:
$ ping xxx.iot.amazonaws.com
PING xxx.iot.amazonaws.com (172.16.1.172) 56(84) bytes of data.
64 bytes from host.docker.internal (172.16.1.172): icmp_seq=1 ttl=127 time=0.372 ms
64 bytes from host.docker.internal (172.16.1.172): icmp_seq=2 ttl=127 time=0.306 ms
64 bytes from host.docker.internal (172.16.1.172): icmp_seq=3 ttl=127 time=0.277 ms
Great!
Handling Hard-Coded DNS
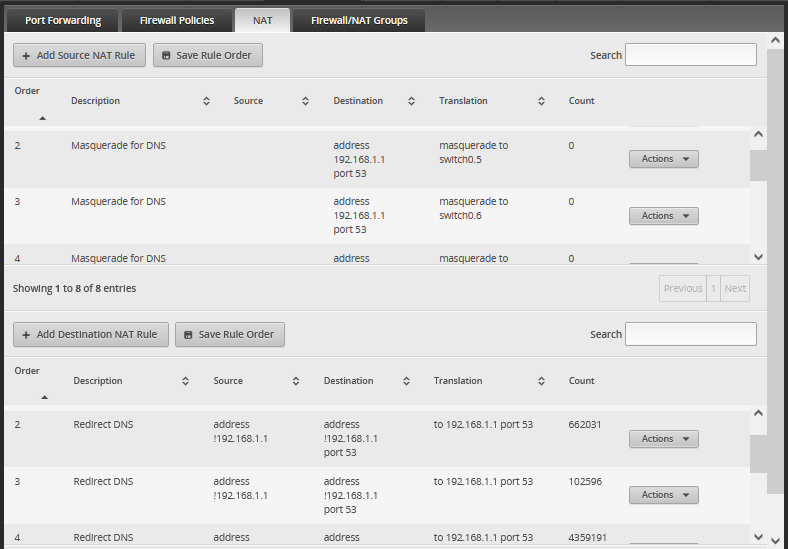
I also use Captive DNS to force all devices on my network to use my AdGuard DNS server. What this means is that when a device initiates a request to a hard-coded DNS server, my router transparently rewrites the destination IP address of port 53 (DNS) traffic to my AdGuard server.
If you have a pfSense, Your Smart TV is probably ignoring your PiHole is a handy guide on doing this on your network. Have an Edgerouter? Check our Redirect Hard-coded DNS To Pi-hole Using Ubiquiti EdgeRouter.
Updating my computer's network config to "hard-code" a DNS server:
$ ipconfig /all

Wireless LAN adapter Wi-Fi:

   Connection-specific DNS Suffix  . : xxx.home
   Description . . . . . . . . . . . : Intel(R) Dual Band Wireless-AC 7265
   ...
   IPv4 Address. . . . . . . . . . . : 172.16.1.172(Preferred)
   ...
   DNS Servers . . . . . . . . . . . : 8.8.8.8
Confirming things are working:
$ ping xxx.iot.amazonaws.com
PING xxx.iot.amazonaws.com (172.16.1.172) 56(84) bytes of data.
64 bytes from host.docker.internal (172.16.1.172): icmp_seq=1 ttl=127 time=0.372 ms
64 bytes from host.docker.internal (172.16.1.172): icmp_seq=2 ttl=127 time=0.306 ms
64 bytes from host.docker.internal (172.16.1.172): icmp_seq=3 ttl=127 time=0.277 ms
Handling Port Rewriting
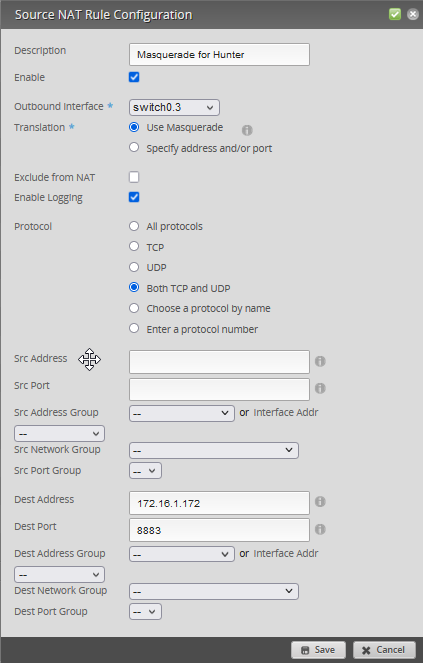
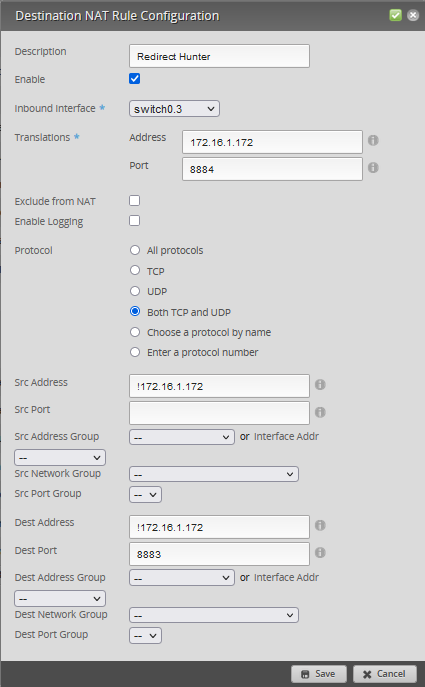
I have an issue where the IOXY devcontainer port forwards to port 8884, instead of 8883. I handled this by using SNAT/DNAT forwarding:
3. Using Routing
TBD
Using Wireless MitM
Check out How To Quickly Setup A Wireless MitM Proxy for a good starting point.
Graveyard
$ atwinc1500_fwtool.exe read -p5

Dumping TLS Store contents...
TLS Certificate Store Loaded Successfully From: Flash
Found 3 entries...
- RSA Certificate Chain File List
  NAME                                             SIZE TYPE         INFO
  PRIV_62a1f32e421df7f65e2290155189f76dbd6953bd    1208 PRIVATE KEY
  CERT_62a1f32e421df7f65e2290155189f76dbd6953bd     861 CERTIFICATE  AWS IoT Certificate
- Private Key Details:
  Modulus (N) :(013D9DA4)(256)
        A9 34 C5 DD 7F 50 C2 23 90 AA 85 5B DA EC 23 80
        09 AB E7 B8 1E 1F 66 1C 37 9E 3A 28 BB 9D 07 6C
        AE D9 50 5C 45 D8 F1 5A 09 4A 44 A1 56 1F A6 41
        4C B4 20 2D D9 0F 78 68 E7 6E 11 61 94 54 70 13
        DF A0 86 38 BC 0F 9E 09 B0 04 39 53 F2 29 35 BF
        8E FA 19 97 86 40 74 3C 20 79 B9 0F 2A 1E 7A 01
        F5 55 C2 BB CE F6 7A AA 14 48 BB 77 92 AB 0E 6D
        C2 FE 6C 62 F6 DD 76 90 63 40 C8 58 2F 4F D6 B1
        87 09 CF C7 40 34 24 E7 26 C1 BB 29 F5 45 C1 7D
        75 4D 79 4A C0 F7 78 FA EA 7F 3F 44 DA F8 BE D0
        17 3D 9E FF 0C BF F9 B6 C4 06 5F 12 88 7C C2 9F
        B8 82 D3 E2 21 A9 73 72 AC 09 9B 2B 4F 91 8A 2D
        E6 5F A0 83 73 82 56 5D 4E 6C 85 A9 43 87 74 81
        2A B3 47 D5 E2 18 F8 39 FC 66 1A 5B D2 C4 06 24
        CC 4C 0E BF 49 2A 90 3D 0F 47 12 16 52 F0 5E B7
        4A 3E F4 76 02 6E 64 C0 16 0B 14 A7 93 90 58 99

- TLS Certificate Details:
    Subject <AWS IoT Certificate>
    Issuer  < >
    <2023-03-23 12:47:18> to <2049-12-31 23:59:59>

Dumping Root Cert Store contents...
Root Certificate Store Loaded Successfully From: Flash
Found 1 entries:
1) RSA Certificate: 5/26/2015 [00:00:00] to 1/17/2038 [00:00:00]
   Name Hash (SHA1): A8 66 80 C4 56 27 2E AF E3 A7 CE 2E 49 D1 31 DC 65 BB B1 ED
