ATWINC1500 IoT Module Deep-Dive (Part 2)
If you haven't read ATWINC1500 IoT Module Deep-Dive (Part 1) start there and come back.
As discussed, we currently have three ways of interacting with the ATWINC1500 module:
winc_usb_programmer.exeto dump firmware over Debug UARTtls_cert_tool.exeto view TLS Cert Store contents- Arduino Wifi101 Firmware/Certificates Updater Tool
If we want need to recover all objects stored in the Root Cert Store and TLS Server Store, we're going to have to write some code.
Surveying The Landscape
As good code writers, we must start our pilgrimage by consulting the Oracle:
- Atmel Software Framework (ASF)
- MPLAB-Harmony
- WiFi101-FirmwareUpdater-Plugin
- SAM-IoT WG Development Board (EV75S95A) Provisioning Tools Package
- Provisioning the Microchip AVR-IoT WA/WG Development Board for Azure IoT Services
- pitaya-go
Each of these provide a piece of the larger puzzle, but, none does exactly what we want.
And, of course, none of it compiles...
Let's get started.
Firmware Analysis
The classic approach to firmware analysis is to pop the damn thing into a hex editor.
Note
My preferred hex editor is ImHex. Why? Mostly because it's open source, it's just the one that worked, and it supports 010 Editor-style binary templates.
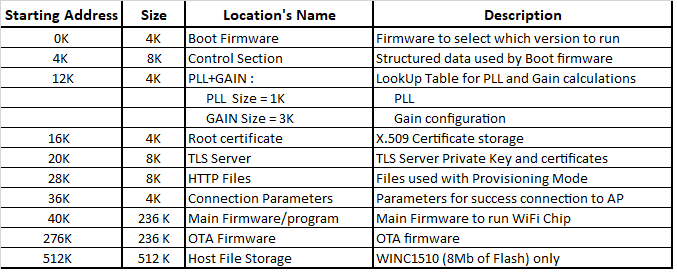
Luckily, Microchip provided us with a memory map (reproduced below), so let's open up atwinc1500-adafruit.bin and take a look!
Root Cert Store
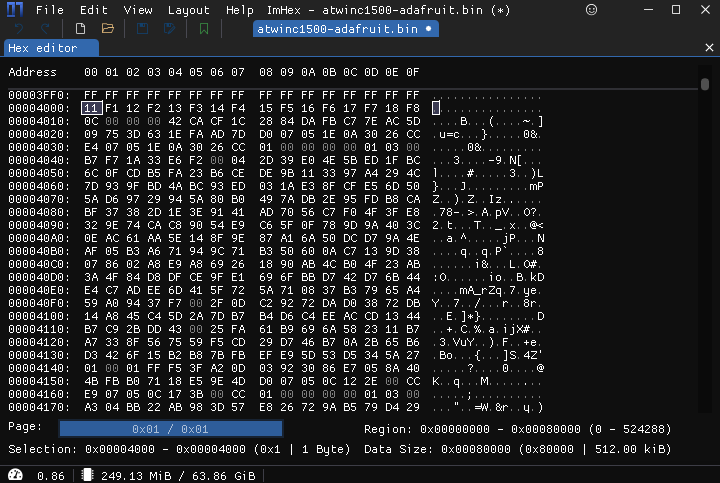
The Root Cert Store is at "16K", which translates to 0x4000:
Comparing what we see with the code in root_tls_cert/root_setup.c should give you the tingles:
#define ROOT_CERT_FLASH_START_PATTERN_LENGTH 16

#define ROOT_CERT_FLASH_EMPTY_PATTERN
{
0xFF, 0xFF, 0xFF, 0xFF, 0xFF, 0xFF, 0xFF, 0xFF,
0xFF, 0xFF, 0xFF, 0xFF, 0xFF, 0xFF, 0xFF, 0xFF
}

// tstrRootCertEntryHeader Format used in 19.4.x
#define ROOT_CERT_FLASH_START_PATTERN_V0
{
0x01, 0xF1, 0x02, 0xF2, 0x03, 0xF3, 0x04, 0xF4,
0x05, 0xF5, 0x06, 0xF6, 0x07, 0xF7, 0x08, 0xF8
}

// tstrRootCertEntryHeader Format used in 19.5.x
#define ROOT_CERT_FLASH_START_PATTERN
{
0x11, 0xF1, 0x12, 0xF2, 0x13, 0xF3, 0x14, 0xF4,
0x15, 0xF5, 0x16, 0xF6, 0x17, 0xF7, 0x18, 0xF8
}
We can see that the dump contains the 19.5.x start pattern!
Now let's take a look at the TLS Store.
TLS Cert Store
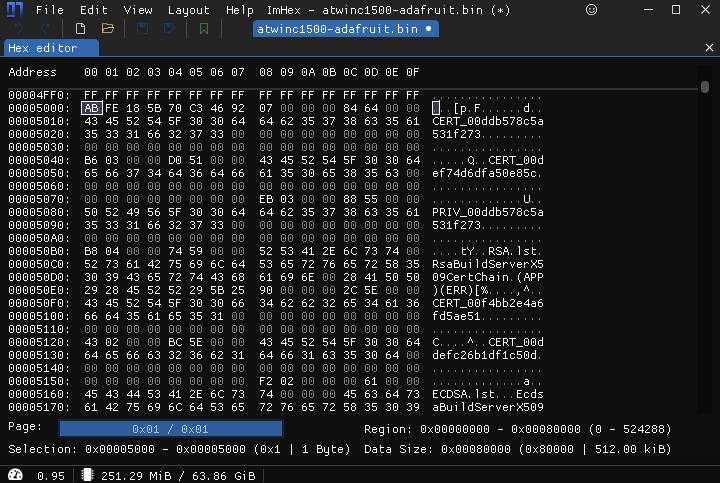
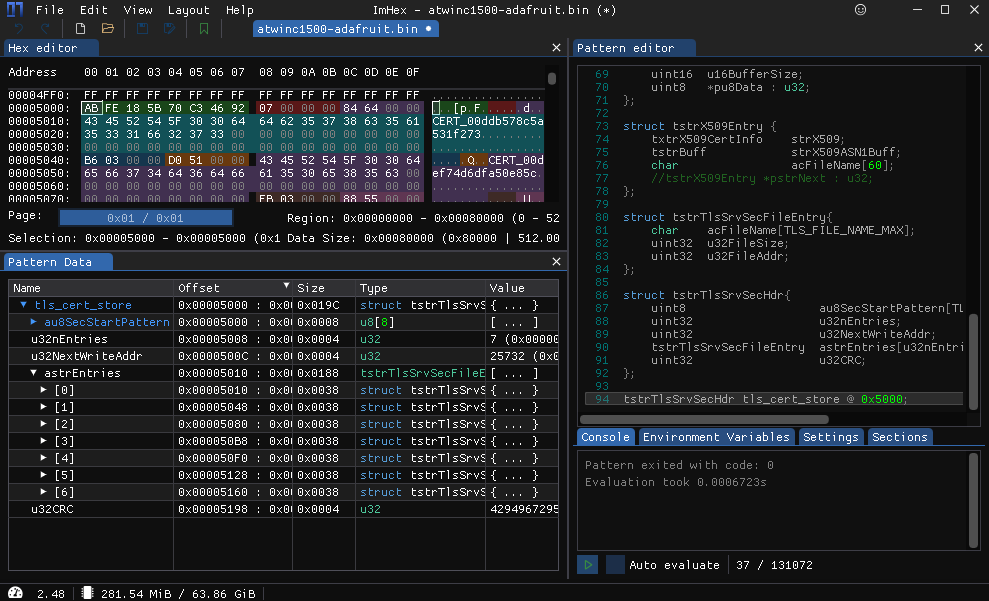
The TLS Cert Store is at "20K", which translates to 0x5000:
The TLS Cert Store start pattern is in root_tls_cert/tls_srv_sec.h:
#define TLS_SRV_SEC_START_PATTERN {0xAB, 0xFE, 0x18, 0x5B, 0x70, 0xC3, 0x46, 0x92}
Woo!
Creating Binary Templates
Now, this is a bit of "Draw the rest of the fucking owl", but the only way to create binary templates is by hand (or with ChatGPT, soon).
In our case, we're lucky enough to have source code available (root_tls_cert), so we can tease out the data structures used to pack the objects into the two areas we're interested in: the Root Cert Store and the TLS Cert Store.
And, voilà:
#define uint8 u8
#define uint32 u32
#define uint16 u16

#define ROOT_CERT_FLASH_START_PATTERN_LENGTH 16
#define CRYPTO_SHA1_DIGEST_SIZE 20


fn WORD_ALIGN(u16 val) {
    return (((val) & 0x03) ? ((val) + 4 - ((val) & 0x03)) : (val));
};

struct tstrSystemTime {
    uint16  u16Year;
    uint8   u8Month;
    uint8   u8Day;
    uint8   u8Hour;
    uint8   u8Minute;
    uint8   u8Second;
    uint8   __PAD8__;
};

// Cert Flash Header
struct tstrRootCertFlashHeader {
    uint8 au8StartPattern[ROOT_CERT_FLASH_START_PATTERN_LENGTH];
    uint32 u32nCerts;
};

enum tenuRootCertPubKeyType : u32 {
    ROOT_CERT_PUBKEY_RSA = 1,
    ROOT_CERT_PUBKEY_ECDSA = 2
};

struct tstrRootCertRsaKeyInfo {
    uint16 u16NSz;
    uint16 u16ESz;
};

struct tstrRootCertEcdsaKeyInfo {
    uint16 u16CurveID;
    uint16 u16KeySz;
};

union RootCertKeyInfo {
    tstrRootCertRsaKeyInfo strRsaKeyInfo;
    tstrRootCertEcdsaKeyInfo strEcsdaKeyInfo;
};

struct tstrRootCertPubKeyInfo {
    uint32 u32PubKeyType;
    RootCertKeyInfo KeyInfo;
};

// Cert Entry Header
struct tstrRootCertEntryHeader {
    uint8 au8SHA1NameHash[CRYPTO_SHA1_DIGEST_SIZE];
    tstrSystemTime strStartDate;
    tstrSystemTime strExpDate;
    tstrRootCertPubKeyInfo strPubKey;
};

struct certEntry {
    tstrRootCertEntryHeader certHeader;
    if (certHeader.strPubKey.u32PubKeyType == 1) {
        u8 N[WORD_ALIGN(certHeader.strPubKey.KeyInfo.strRsaKeyInfo.u16NSz)];
        u8 E[WORD_ALIGN(certHeader.strPubKey.KeyInfo.strRsaKeyInfo.u16ESz)];
    }
    if (certHeader.strPubKey.u32PubKeyType == 2) {
        u8 data[WORD_ALIGN(certHeader.strPubKey.KeyInfo.strEcsdaKeyInfo.u16KeySz)*2];
    }
};

struct header {

    tstrRootCertFlashHeader header;
    certEntry cert[header.u32nCerts];

};

header root_cert_store @ 0x4000;
#define uint8 u8
#define uint32 u32
#define uint16 u16

#define ECC_POINT_MAX 72

#define TLS_FILE_NAME_MAX 48
#define TLS_SRV_SEC_MAX_FILES 8
#define TLS_SRV_SEC_START_PATTERN_LEN 8

struct tstrSystemTime {
    uint16  u16Year;
    uint8   u8Month;
    uint8   u8Day;
    uint8   u8Hour;
    uint8   u8Minute;
    uint8   u8Second;
    uint8   __PAD8__;
};

enum tenuCertPubKeyType : u16 {
    X509_CERT_PUBKEY_RSA    = 1,
    X509_CERT_PUBKEY_ECDSA  = 2
};


struct tstrECDSAPubKey{
    uint16  u16CurveID;
    uint16  u16EcPointSz;
    uint8   au8EcPoint[ECC_POINT_MAX * 2];
};

struct tstrRSAPubKey {
    uint16  u16NSize;
    uint16  u16ESize;
    uint8   *pu8N : u32;
    uint8   *pu8E : u32;
};


union PubKey {
    tstrRSAPubKey   strRsaPub;
    tstrECDSAPubKey strEcdsaPub;
};

struct tstrX509CertPublicKey{
    tenuCertPubKeyType  enuCertKeyType;
    PubKey pubKey;
};

struct tstrX509Name {
    char    acCmnName[64];
    uint8   au8NameSHA1[20];
};


struct txtrX509CertInfo{
    uint8                   u8SerialNumberLength;
    uint8                   au8SerialNo[64];
    tstrX509Name            strIssuer;
    tstrSystemTime          strExpiryDate;
    tstrSystemTime          strStartDate;
    tstrX509Name            strSubject;
    tstrX509CertPublicKey   strPubKey;
    uint16                  *pvPrivate : u32;
};

struct tstrBuff {
    uint16  u16BufferSize;
    uint8   *pu8Data : u32;
};

struct tstrX509Entry {
    txtrX509CertInfo    strX509;
    tstrBuff            strX509ASN1Buff;
    char                acFileName[60];
    //tstrX509Entry *pstrNext : u32;
};

struct tstrTlsSrvSecFileEntry{
    char    acFileName[TLS_FILE_NAME_MAX];
    uint32  u32FileSize;
    uint32  u32FileAddr;
};

struct tstrTlsSrvSecHdr{
    uint8                   au8SecStartPattern[TLS_SRV_SEC_START_PATTERN_LEN];
    uint32                  u32nEntries;
    uint32                  u32NextWriteAddr;
    tstrTlsSrvSecFileEntry  astrEntries[u32nEntries];
    uint32                  u32CRC;
};

tstrTlsSrvSecHdr tls_cert_store @ 0x5000;
To play along, grab an ATWINC1500 firmware image here
If you have Arduino installed, you can find ATWINC1500 binaries in: C:\Program Files (x86)\Arduino\WiFi101\tool\firmwares\WINC1500\19.6.1.
If you don't, you can grab one here: link
Root Cert Store
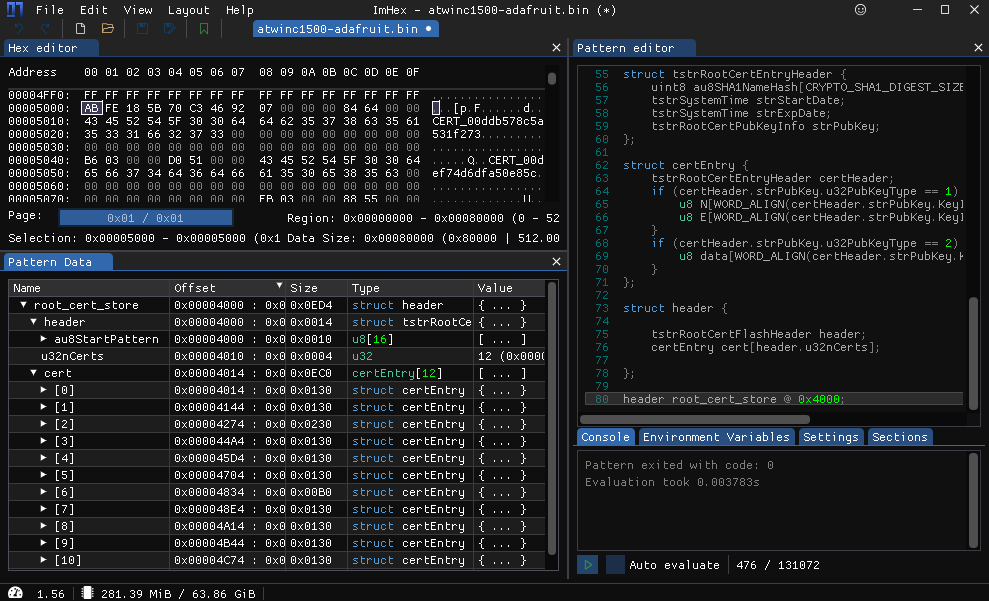
Loading up the Root Cert Store template in ImHex, we can see that my Root Cert Store currently contains 12 certs:
TLS Cert Store
Loading up the TLS Cert Store template in ImHex, we can see that my Root Cert Store currently contains 7 entries:
Now that we have an idea of how things are organized the stores, let's take our hand at getting the tantalizingly named tls_cert_flash_tool compiling.
Further Reading
tls_cert_flash_tool
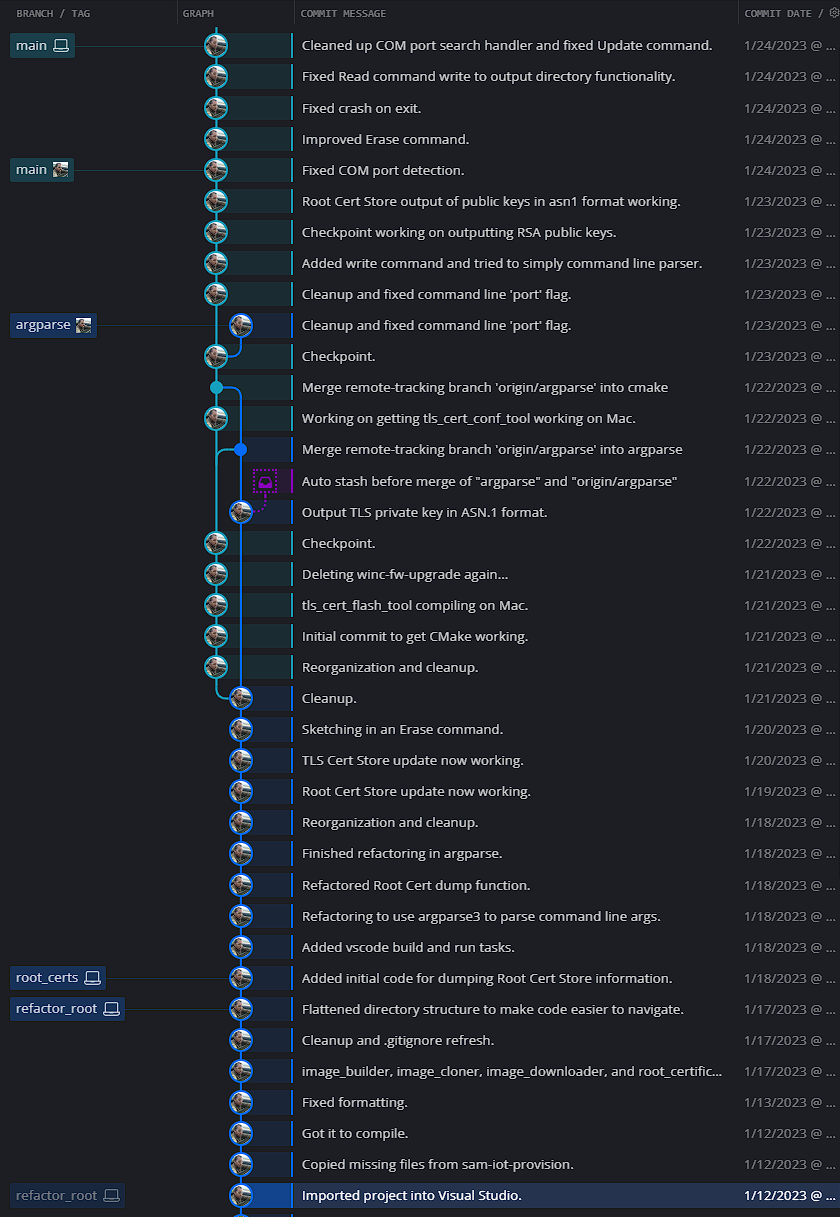
To get the tls_cert_flash_tool solution to compile, you'll need random headers from the randywu763/sam-iot-provision and about two weeks:
When you're done, you'll end up with a whole new binary called atwin1500_fwtool (yes, I went down a rabbit hole 🤣).
atwin1500_fwtool
atwin1500_fwtool is a heavily modified/refactored version of tls_cert_flash_tool, with the following improvements:
- Improved CLI
- Less crashy
- Less trashy
- Allows dumping of all objects in TLS Cert Store and Root Cert Store
Building
To build the binary, clone the peddamat/AzureDemo_AVR-IoT_Wx repo: link
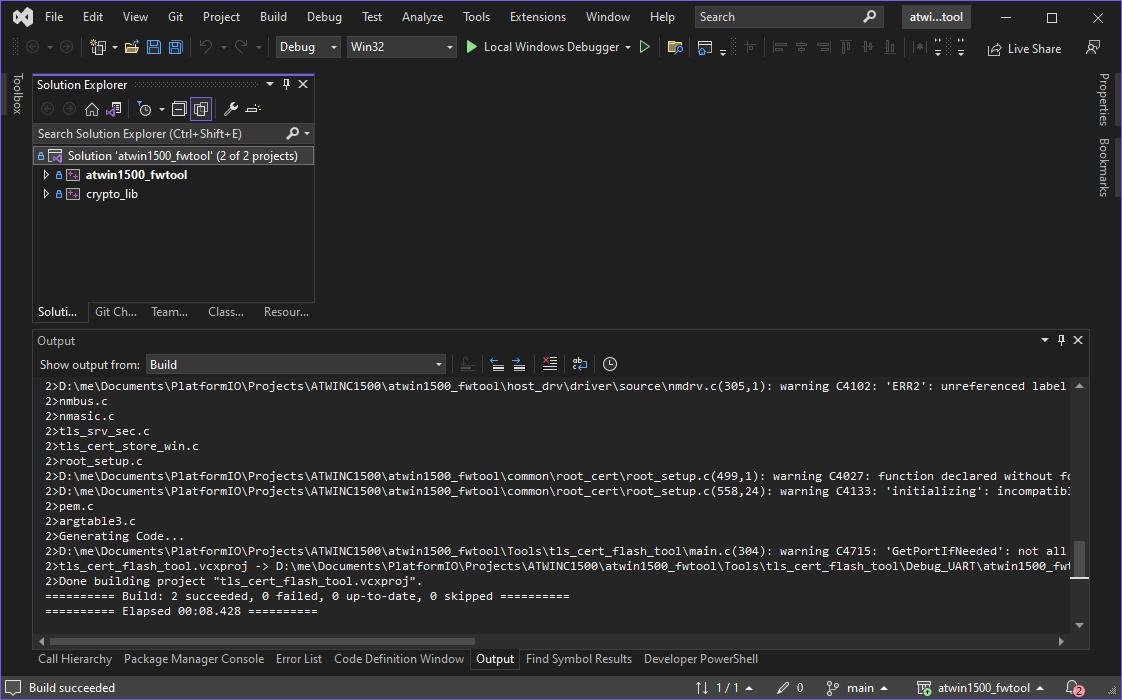
Visual Studio 2022
Then, open up the \Tools\tls_cert_flash_tool\atwin1500_fwtool.sln solution in Visual Studio 2022 and hit compile:
The solution places the binary in \Tools\tls_cert_flash_tool\Debug_UART\atwin1500_fwtool.exe.
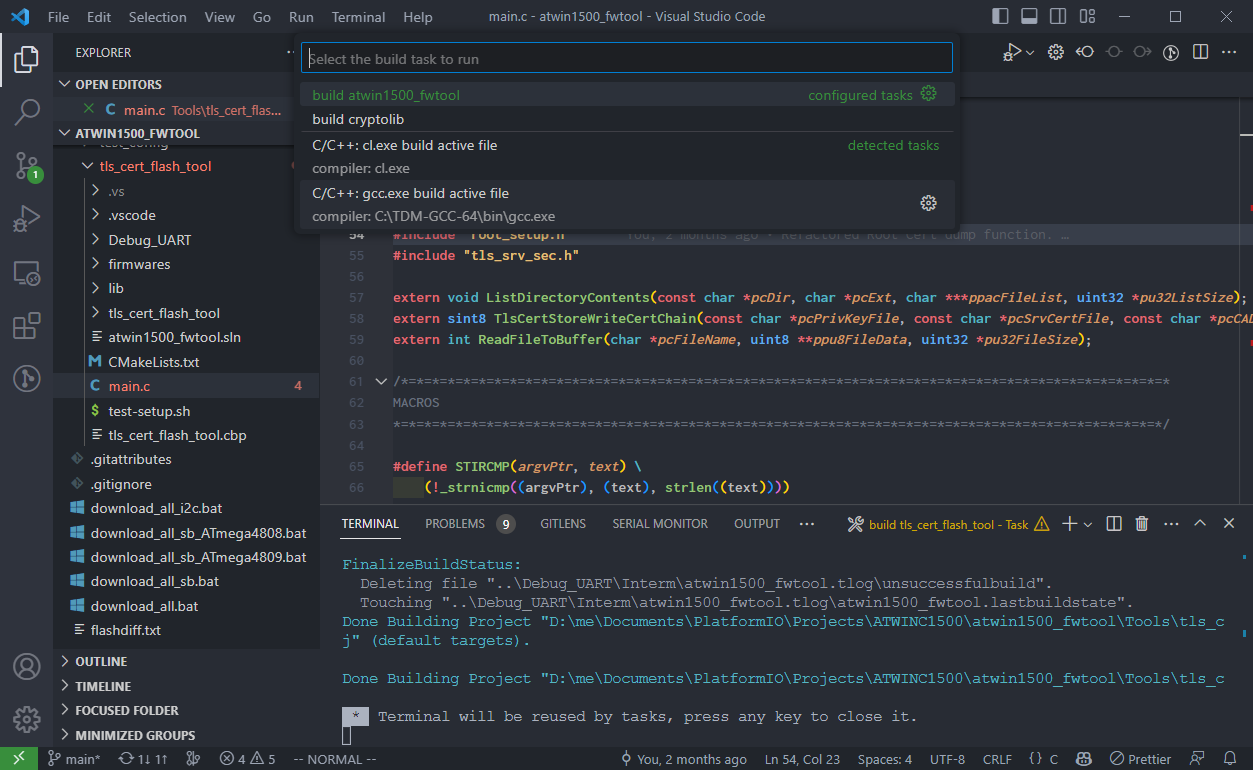
Visual Studio Code
The solution can also be compiled in VSCode, by running the build atwinc1500_fwtool task:
Usage
The tool has an improved CLI:
$ atwinc1500_fwtool.exe
Usage:
  atwin1500_fwtool.exe  [-vh] read [<firmware image>] [-o <output directory>] [-p <COM Port>]
  atwin1500_fwtool.exe  [-trh] update [<firmware image>] [-o <output directory>] [--key=<key>]
                        [--cert=<cert>] [--ca_dir=<ca_dir>] [--erase] [-p <COM Port>]
  atwin1500_fwtool.exe  [-trh] erase [<firmware image>] [-p <COM Port>]
  atwin1500_fwtool.exe  [-h] write <firmware image> [-p <COM Port>]

For a specific command help, use <atwin1500_fwtool.exe <CMD> --help>
Read Command
Using the read command and specifying an output directory will write the contents of the Root Cert Store and TLS Server Store to the specified directory:
$ atwinc1500_fwtool.exe read --help

Usage: atwin1500_fwtool.exe  [-vh] read [<firmware image>] [-o <output directory>] [-p <COM Port>]

Read contents of Root Cert Store and TLS Server Store from WINC Device or a given WINC firmware image

Options:
  <firmware image>          Input firmware binary
  -o <output directory>     Directory to dump certs
  -v, --verbose             Output more details
  -p, --port=<COM Port>     COM Port
  -h, --help                Show help

Examples:
  atwin1500_fwtool.exe read -o <output dir>
  atwin1500_fwtool.exe read atwinc1500.bin
  atwin1500_fwtool.exe read atwinc1500.bin -v
Example
$ tls_cert_flash_tool.exe read atwinc1500-adafruit.bin -o output-adafruit

Dumping TLS Store contents...
TLS Certificate Store Loaded Successfully From: Firmware Image
Found 7 entries...
- RSA Certificate Chain File List
  NAME                                             SIZE TYPE         INFO
  PRIV_00ddb578c5a531f273                          1208 PRIVATE KEY
  CERT_00ddb578c5a531f273                           950 CERTIFICATE  *.winc.atmel.com
  CERT_00def74d6dfa50e85c                          1003 CERTIFICATE  WINCRootCA
- ECDSA Certificate Chain File List
  NAME                                             SIZE TYPE         INFO
  CERT_00f4bb2e4a6fd5ae51                           579 CERTIFICATE  *.winc.atmel.com
  CERT_00ddefc26b1df1c50d                           754 CERTIFICATE  AtmelEccCA
  CERT_00def74d6dfa50e85c                          1003 CERTIFICATE  WINCRootCA
- Private Key Details:
  Size: (2048 bit)
  Modulus (N) :(00D5322C)(256)
        AD 62 49 6E 87 72 FA D4 E0 1A 48 1C B8 B4 5E D1
        9D B9 EC A4 99 86 6D 23 9E 10 BD 8D D3 07 FA 58
        63 D1 E9 FB 8D A5 9B 61 83 68 4D 17 C8 35 E1 85
        89 85 6F 29 91 CC AC A4 B1 3C E2 F4 E3 81 9E 30
        8A 86 11 FF D4 97 C0 DD B1 14 64 44 14 C9 F9 BA
        59 1B 8F 82 07 23 D0 00 C1 AD 95 BC 28 39 19 87
        FB F3 10 5E 25 EF FB 8A 54 CA 96 1F A2 03 1C 90
        DB 51 44 93 C9 11 EF 3F 93 34 66 36 6B 48 44 61
        14 0A FE 15 AB 53 74 0B F7 30 F8 7B 3E 55 98 32
        10 94 53 FA BC C4 C2 0D CE 91 F5 3D 50 3B 69 A8
        3A AF 03 09 C4 A4 74 4C 62 49 98 C9 FC 1E 9B 7F
        A7 9B 2D A4 BF C2 AE 42 D0 E7 09 27 D2 E4 CD DC
        D0 88 3B 43 20 F2 15 0D 32 92 8E 4D 9E C6 E9 C6
        DE 7D 65 01 22 E1 B7 60 6F C0 27 11 7C F7 FA FD
        7C FE 5B 23 A7 00 56 DF 99 ED 1A 44 CF D6 BA F9
        8A 09 6A D3 54 81 55 25 86 7D C0 7C 68 CC FF 31
Dumping Root Cert Store contents...
Root Certificate Store Loaded Successfully From: Firmware Image
Found 12 entries:
1) RSA Certificate: 5/30/2000 [10:48:38] to 5/30/2020 [10:48:38]
   Name Hash (SHA1): 42 CA CF 1C 28 84 DA FB C7 7E AC 5D 09 75 3D 63 1E FA AD 7D
...
The output-adafruit directory contains:
$ tree
.
├── AtmelEccCA.cer
├── ECDSA_winc.atmel.com.cer
├── RSA_winc.atmel.com.cer
├── WINCRootCA.cer
├── private-key.asn1
├── private-key.bat
├── public-key.bat
├── public-rsa-cert-01.asn1
...
The two .bat files convert the .asn1 files into .der format:
private-key.bat
openssl asn1parse -genconf private-key.asn1 -out private-key.der -noout
openssl rsa -in private-key.der -inform der -out private-key.pem
openssl rsa -in private-key.pem -text -noout
public-key.bat
openssl asn1parse -genconf public-rsa-cert-01.asn1 -out public-rsa-cert-01.der -noout
openssl pkey -pubin -in public-rsa-cert-01.der -inform DER -text -noout
...
Write Command
The write command allows writing firmware images to the device over USB/serial:
$ atwinc1500_fwtool.exe write --help

Usage: atwin1500_fwtool.exe  [-h] write <firmware image> [-p <COM Port>]

Write WINC firmware image file to device

Options:
  <firmware image>          Input firmware binary
  -p, --port=<COM Port>     COM Port
  -h, --help                Show help

Examples:
  atwin1500_fwtool.exe write -key rsa.key -cert rsa.cer -erase
  atwin1500_fwtool.exe write -key rsa.key -cert rsa.cer -fwimg m2m_aio_3a0.bin
Example
$ atwin1500_fwtool.exe write atwinc1500-adafruit.bin

Writing firmware to device...
Detecting COM port...
Avail port COM5
1 of ports found
- Reading firmware from disk...
- Writing firmware to device...
Update Command
$ atwinc1500_fwtool.exe update --help

Usage: atwin1500_fwtool.exe  [-trh] update [<firmware image>] [-o <output directory>] [--key=<key>]
                             [--cert=<cert>] [--ca_dir=<ca_dir>] [--erase] [-p <COM Port>]

Update contents of Root Cert Store or TLS Server Store from WINC Device or a given WINC firmware image

Options:
  <firmware image>          Input firmware binary
  -o <output directory>     Directory to dump certs
  --key=<key>               Private key in PEM format (RSA Keys only). It MUST NOT be encrypted
  --cert=<cert>             X.509 Certificate file in PEM or DER format
  -t, --tls                 TLS Store
  -r, --root                Update Root Store
  --ca_dir=<ca_dir>         Path to folder containing intermediate CAs and/or Root CA of given certificate
  --erase                   Erase the certificate store before writing. If this option is not given, the new certificate material is appended to the certificate store
  -p, --port=<COM Port>     COM Port
  -h, --help                Show help

Examples:
  atwin1500_fwtool.exe update --tls -key rsa.key --cert rsa.cer --erase
  atwin1500_fwtool.exe update --root --cadir <dir>
Example
atwin1500_fwtool.exe update \
    --key=..\connect_device_package\feathermitm.private.key \
    --cert=..\connect_device_package\feathermitm.cert.pem \
    --ca_dir=..\connect_device_package
Erase Command
The erase command allows erasing the TLS Cert Store and/or Root Cert Store, either directly via USB or to a file:
$ atwinc1500_fwtool.exe erase --help

Usage: atwin1500_fwtool.exe  [-trh] erase [<firmware image>] [-p <COM Port>]

Erase contents of Root Cert Store or TLS Server Store from WINC Device or a given WINC firmware image

Options:
  <firmware image>          Input firmware binary
  -t, --tls                 Erase TLS Store
  -r, --root                Erase Root Store
  -p, --port=<COM Port>     COM Port
  -h, --help                Show help

Examples:
  atwin1500_fwtool.exe erase --root
  atwin1500_fwtool.exe erase --tls
  atwin1500_fwtool.exe erase --root --tls
Example
$ atwin1500_fwtool.exe erase --tls --root

Erasing device...
Detecting COM port...
Avail port COM5
1 of ports found
TLS Certificate Store Updated Successfully On: Flash
Root Certificate Store Updated Successfully On: Flash
Then checking with a read:
$ atwin1500_fwtool.exe read

Dumping TLS Store contents...
Detecting COM port...
Avail port COM5
1 of ports found
TLS Certificate Store Loaded Successfully From: Flash
- Parsing TLS Store...
- Found 0 entries...

Dumping Root Cert Store contents...
Root Certificate Store Loaded Successfully From: Flash
- Found 0 entries!
Serial Bridge Arduino Port
Awesome, now that we have all that working, there's still the promise of the "Serial Bridge" example which Microchip frequently mentions throughout their documentation.
By getting it working, we can interact directly with the ATWIN1500 module over USB using atwin1500_firmware.exe.
Scouring the internet, you can find many, many versions of this mythical "Serial Bridge" example. I settled on the serial_bridge_example from the avrxml/asf repository.
The ported code can be found here peddamat/SerialBridge and is configured to work out-of-the-box on Adafruit Feather M0 boards.
Building
The project is a PlatformIO project and can be built and uploaded to the board using the Upload task:
The output log should look something like this:
Atmel SMART device 0x10010005 found
Erase flash
done in 0.824 seconds

Write 25192 bytes to flash (394 pages)

[====                          ] 16% (64/394 pages)
[=========                     ] 32% (128/394 pages)
[==============                ] 48% (192/394 pages)
[===================           ] 64% (256/394 pages)
[========================      ] 81% (320/394 pages)
[============================= ] 97% (384/394 pages)
[==============================] 100% (394/394 pages)
done in 0.197 seconds

Verify 25192 bytes of flash with checksum.
Verify successful
done in 0.018 seconds
CPU reset.
=============================================================================== [SUCCESS] Took 33.98 seconds ===============================================================================
Usage
Once the Feather MCU has been programmed with the Serial Bridge firmware, the we can use the atwin1500_fwtool to directly read, write, update, and erase the TLS and Root Cert Stores over USB!
Notes
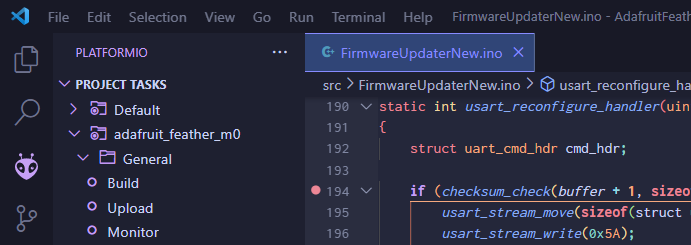
Arduino provides a similar "Serial Bridge" in the form of the FirmwareUpdater sketch:
Supporting Code
A small reward for folks who made it all the way down here. Here's how to grab the supporting code for this series:
git clone https://github.com/peddamat/hunter-hacking-adafruit.git adafruit
git submodule init
git submodule update
$ git clone https://github.com/peddamat/hunter-hacking-adafruit.git adafruit
Cloning into 'adafruit'...
remote: Enumerating objects: 6, done.
remote: Counting objects: 100% (6/6), done.
remote: Compressing objects: 100% (4/4), done.
remote: Total 6 (delta 0), reused 6 (delta 0), pack-reused 0
Receiving objects: 100% (6/6), done.

$ cd adafruit

$ git submodule init
Submodule 'AWS_IoT_WiFi' (https://github.com/peddamat/AWS_IoT_WiFi.git) registered for path 'AWS_IoT_WiFi'
Submodule 'CheckWifi101FirmwareVersion' (https://github.com/peddamat/CheckWifi101FirmwareVersion.git) registered for path 'CheckWifi101FirmwareVersion'
Submodule 'FirmwareUpdater' (https://github.com/peddamat/FirmwareUpdater.git) registered for path 'FirmwareUpdater'
Submodule 'SerialBridge' (https://github.com/peddamat/SerialBridge.git) registered for path 'SerialBridge'
Submodule 'WiFiSSLClient' (https://github.com/peddamat/WiFiSSLClient.git) registered for path 'WiFiSSLClient'

$ git submodule update
Cloning into 'D:/adafruit/AWS_IoT_WiFi'...
Cloning into 'D:/adafruit/CheckWifi101FirmwareVersion'...
Cloning into 'D:/adafruit/FirmwareUpdater'...
Cloning into 'D:/adafruit/SerialBridge'...
Cloning into 'D:/adafruit/WiFiSSLClient'...
Submodule path 'AWS_IoT_WiFi': checked out '65ac6bdbc864748b4c48fe95dbdd041d50e33341'
Submodule path 'CheckWifi101FirmwareVersion': checked out '9593f8e9bdb041349084fef4bb3f06dc7aaf0e7f'
Submodule path 'FirmwareUpdater': checked out 'c1e5802f97e2d62f2ec3b486589b3b0cadf2a367'
Submodule path 'SerialBridge': checked out '6ccd76051e346f6db61f078a27da89b6fb6e11b2'
Submodule path 'WiFiSSLClient': checked out '89d6b111e2402d908edb44502ff8c29446c446ee'
Next Steps
Now that we've added a few tools to our arsenal, let's take things further and see Hands On IoT MitM (Part 1)!
