A Look Inside A Hunter Pro-HC Controller
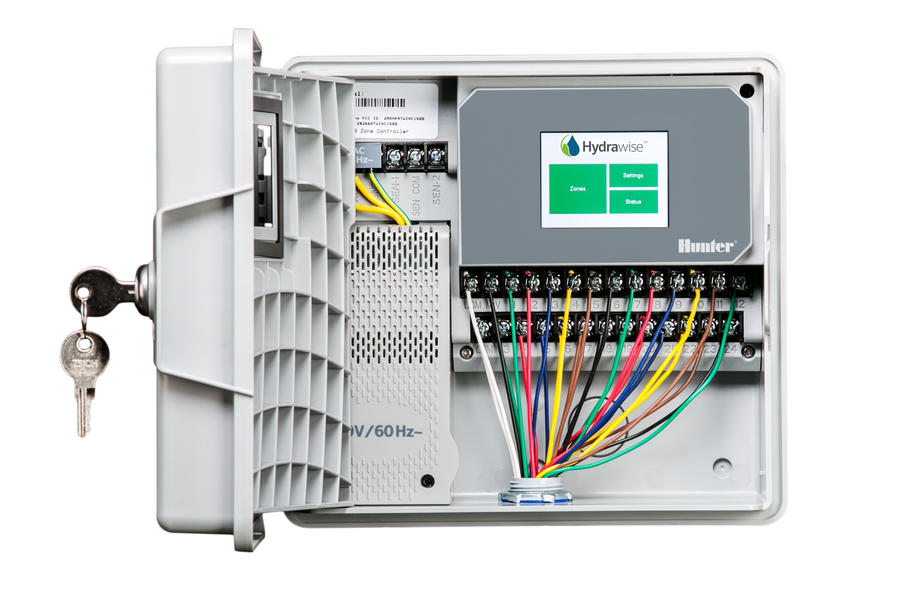
I recently completed a redesign of my home's irrigation system, replacing an old Rainbird ESP-2 controller with a Hunter Pro-HC, a "professional-grade WiFi controller for residential and light commercial applications".
The controller is part of the "Hydrawise" family of devices, a platform to enable internet-connectivity.
The platform is great, but does not provide any mechanisms for local control of the controller.
Research
While adding the controller to my network, I came across this blurb here:
Which seems to indicate that it uses Secure MQTT to communicate with its backend services.
If Hydrawise is, in fact, built using MQTT, it would be fantastic, because MQTT and Home Assistant go together like ice cream and apple pie.
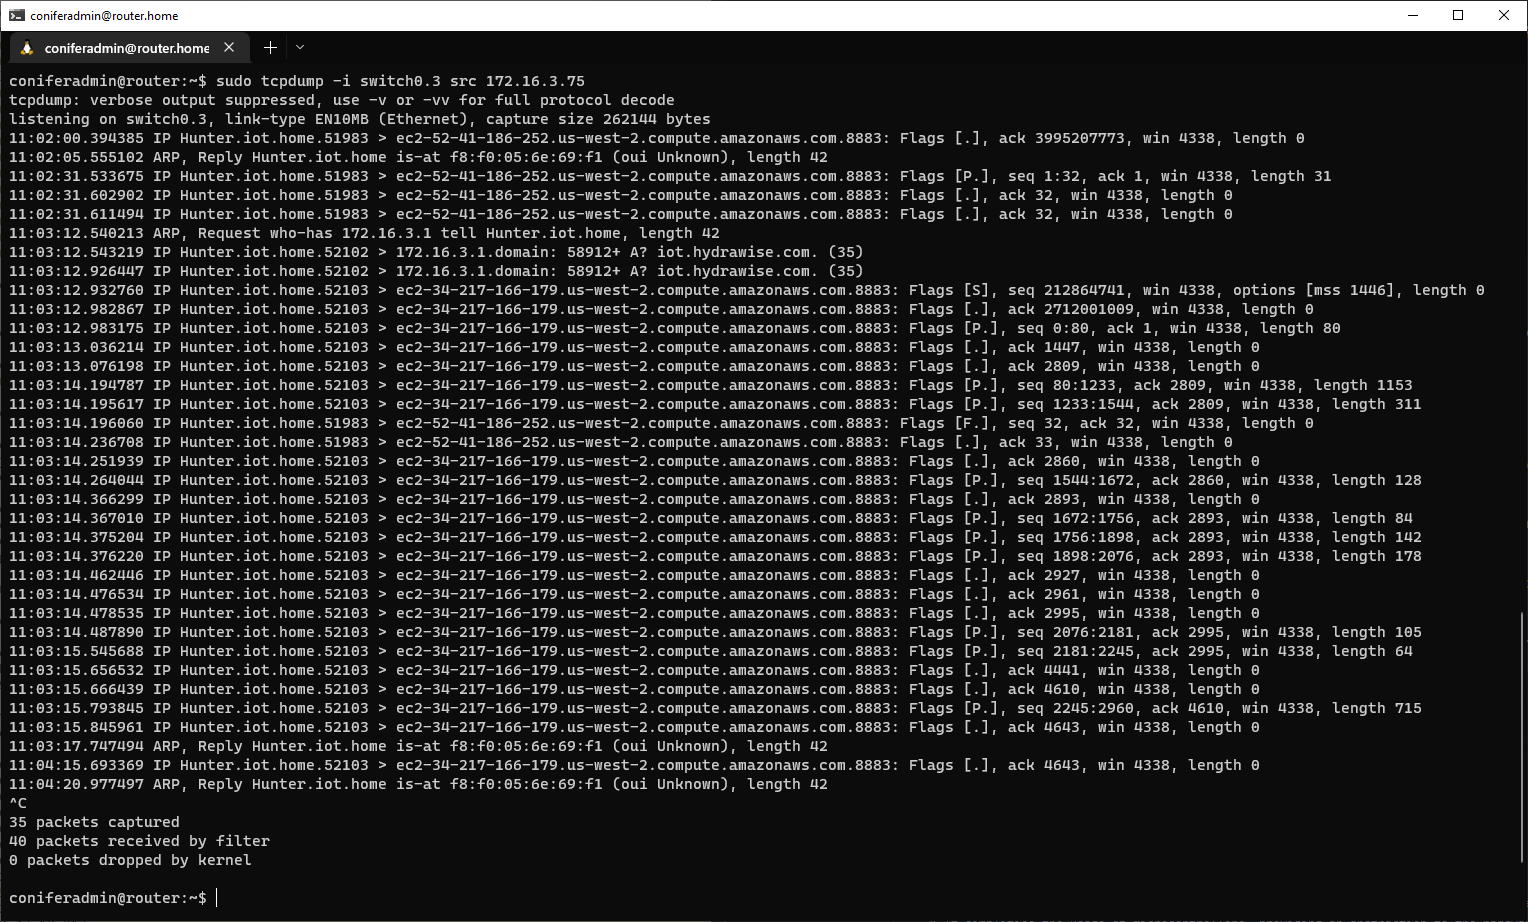
Sniffing the controller's traffic confirms port 8883 traffic to backend services hosted on AWS:
Internals
PCB
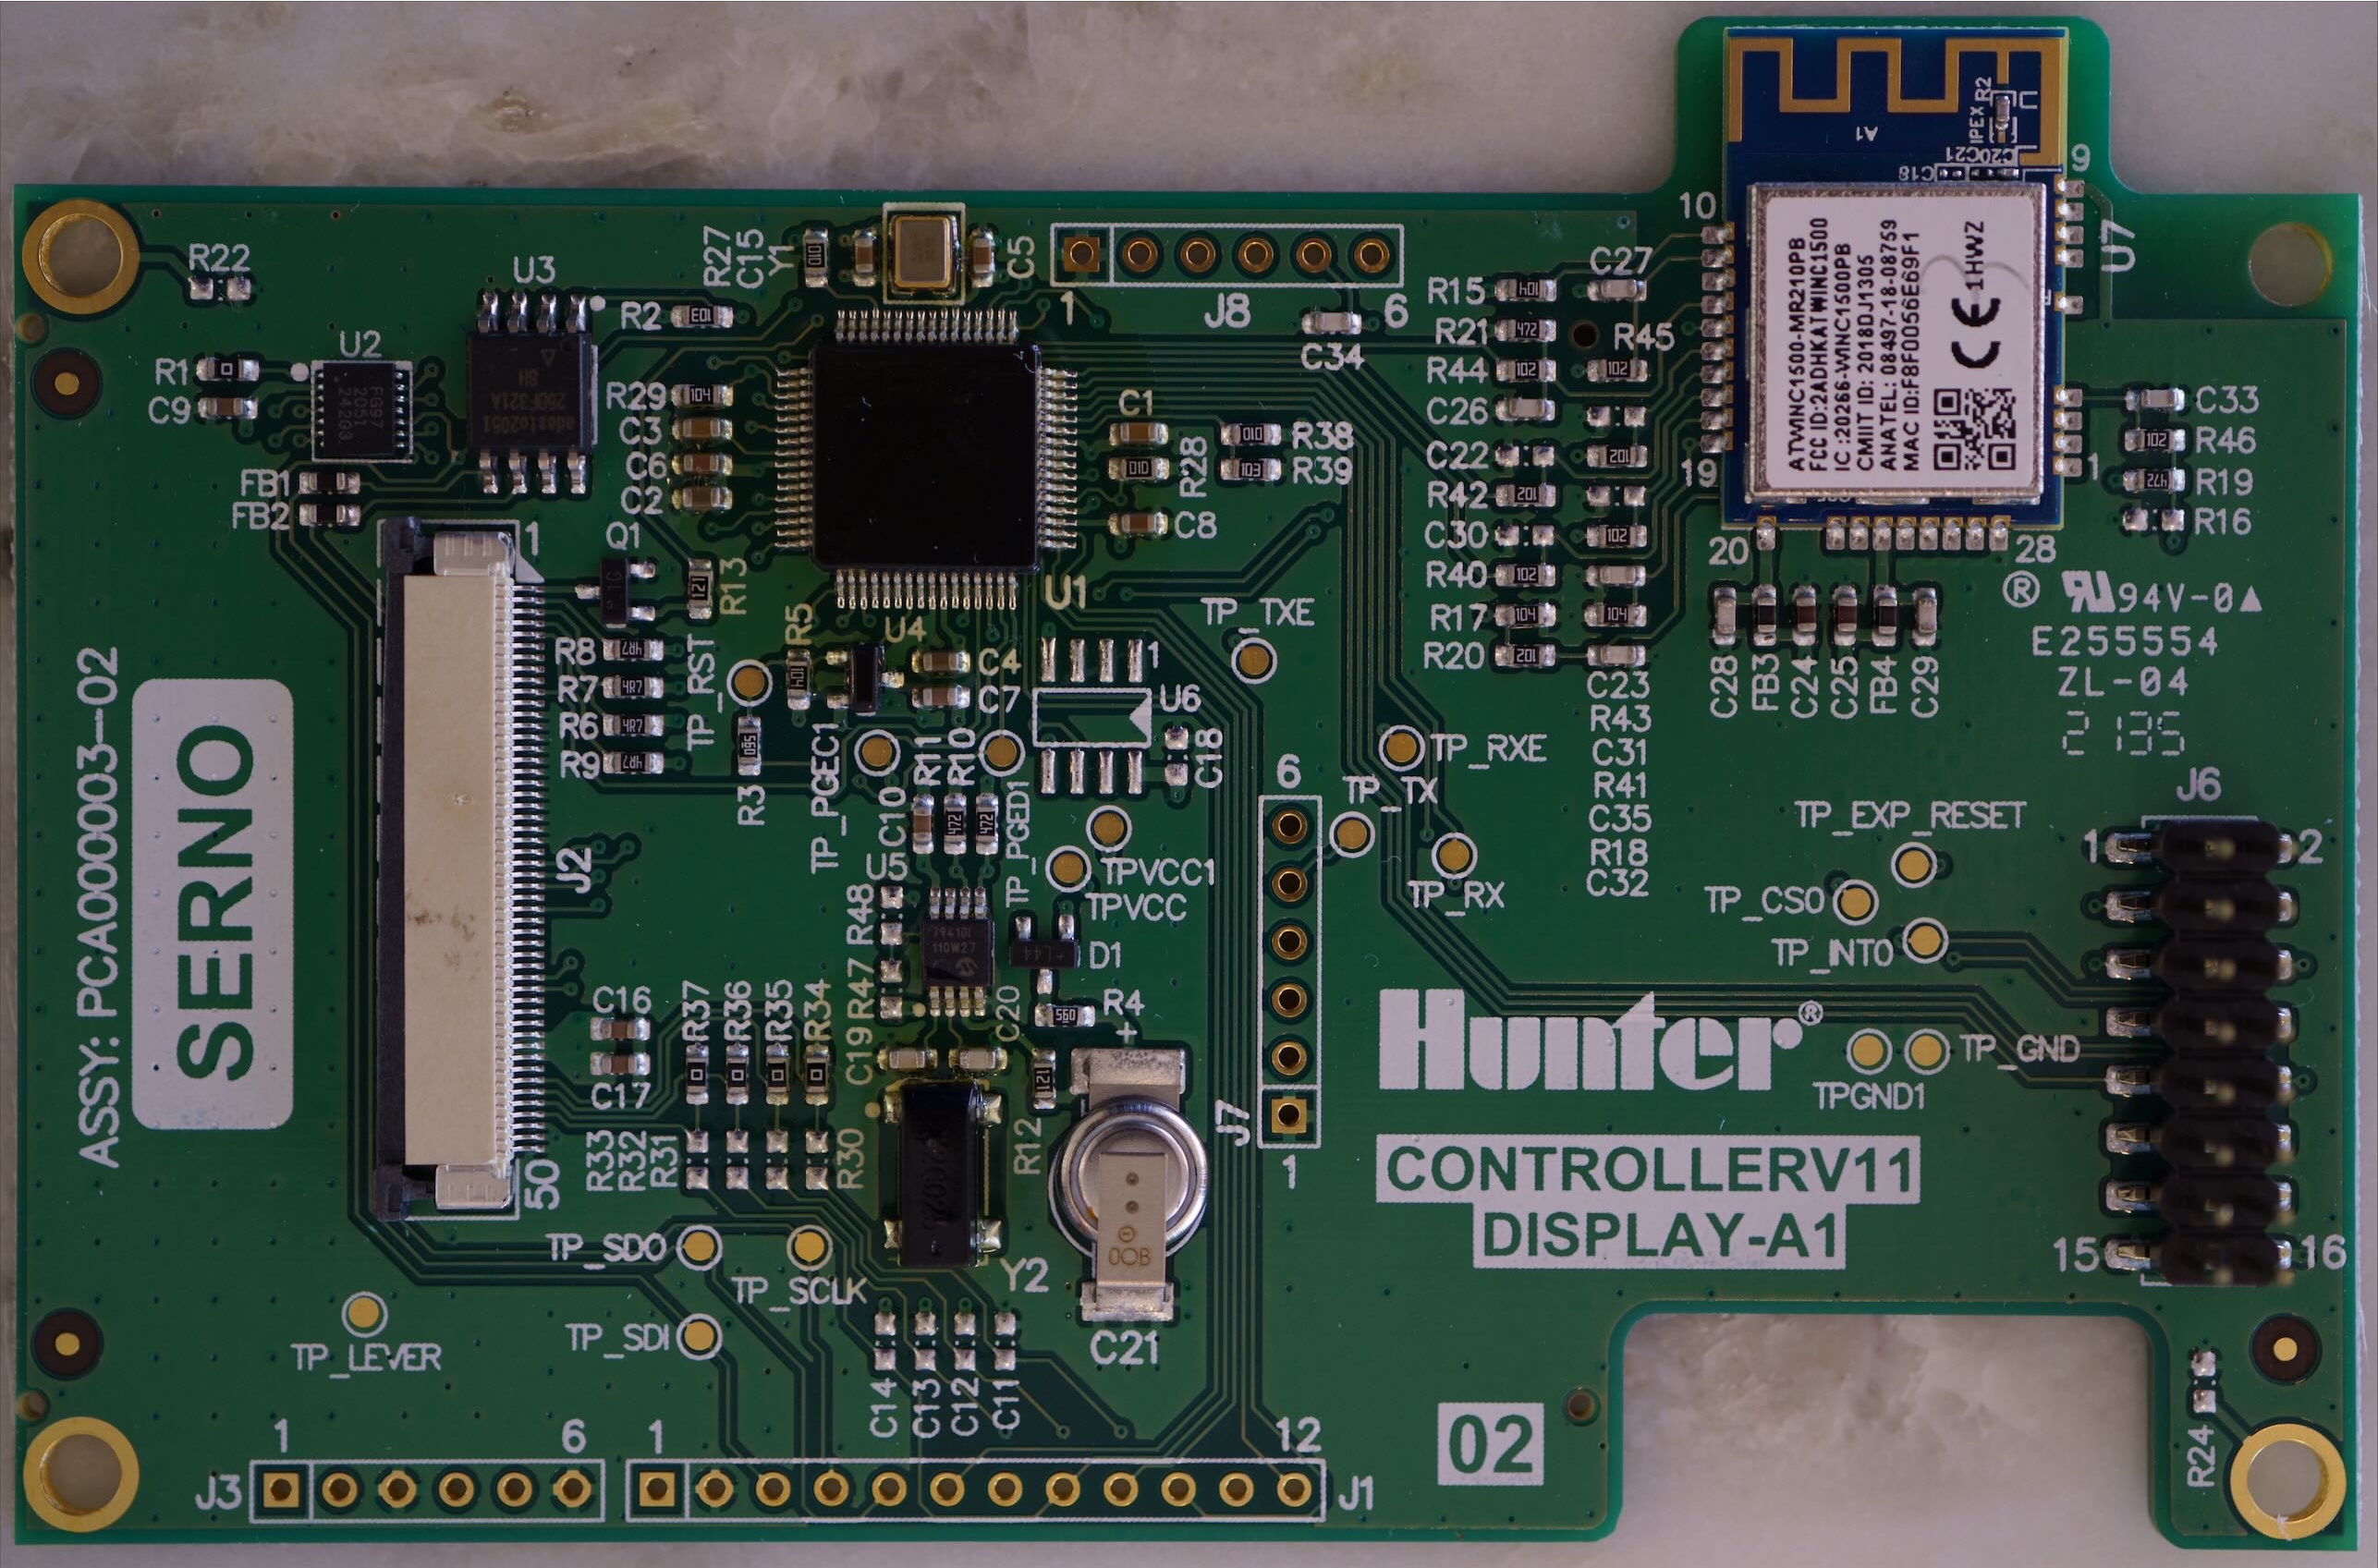
Cracking open the device reveals a nicely designed PCB:
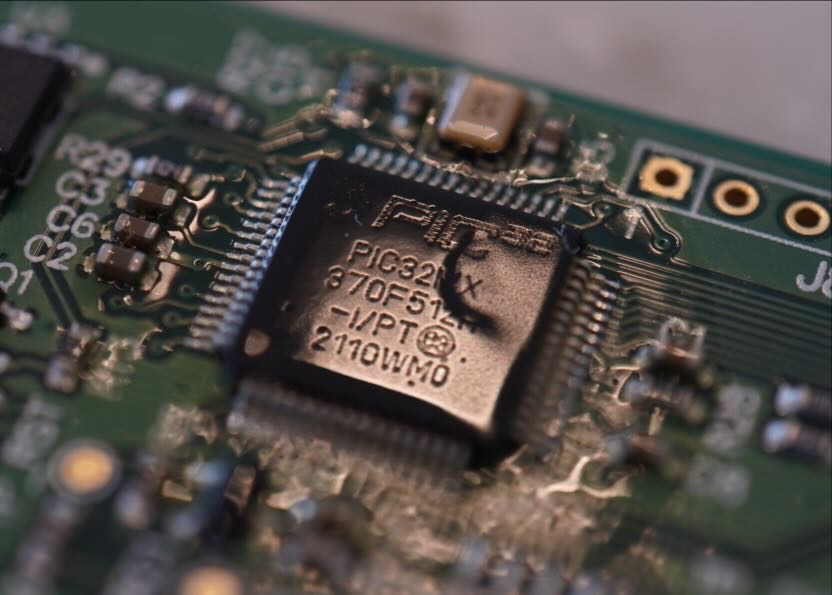
The two interesting ICs on the PCB are a Microchip PIC32 microcontroller and an Atmel ATWINC1500 WiFi module:
Microchip PIC32
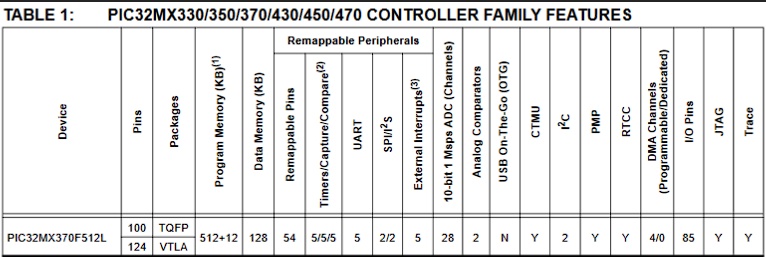
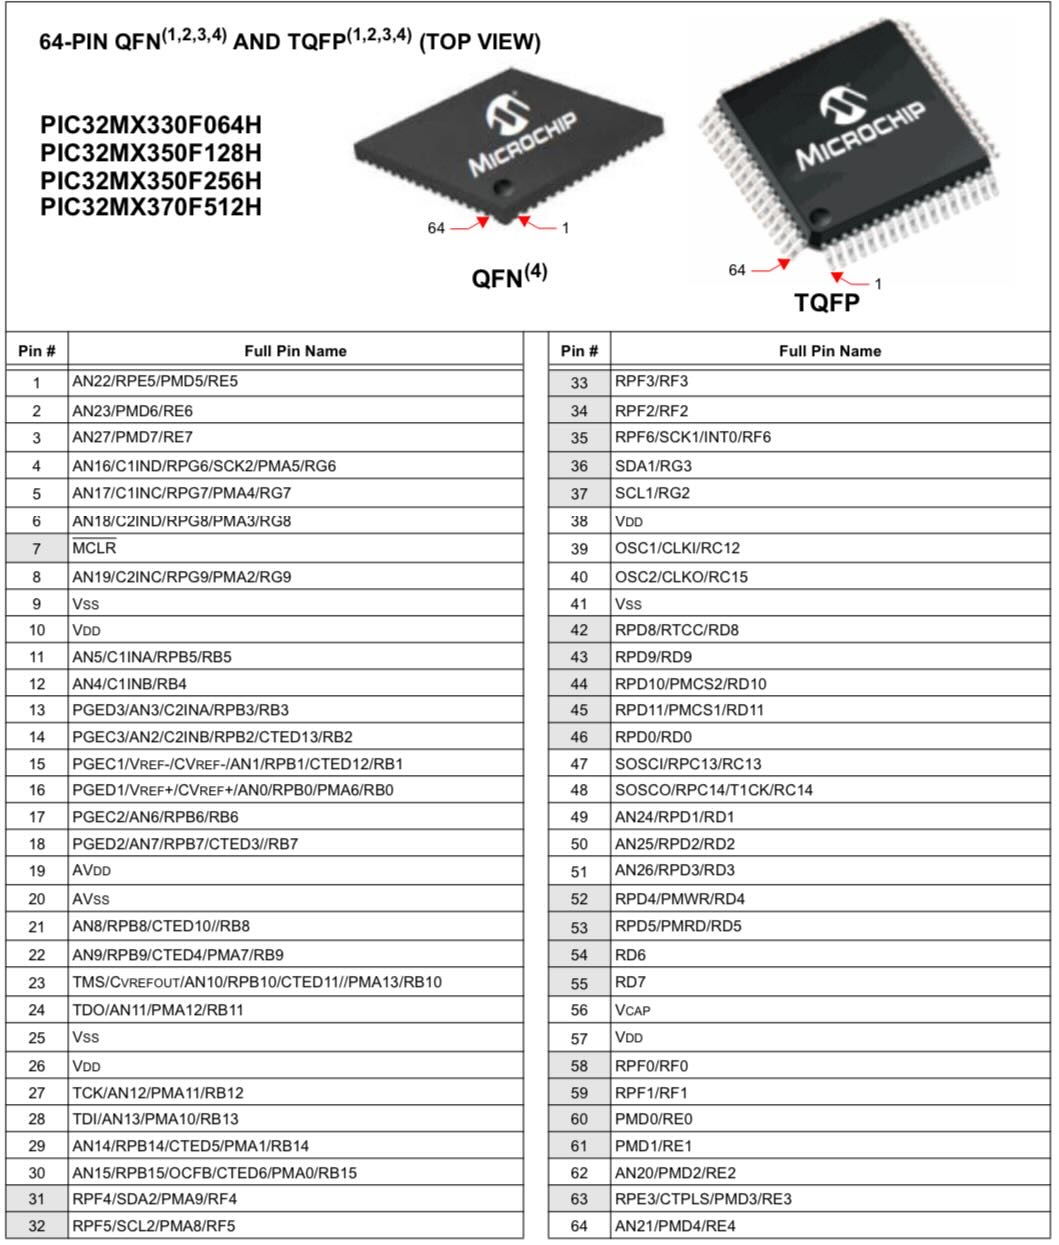
The Microchip PIC32MX370F512L is a 32-bit MIPS-based microcontroller with the following specs:
With specs like that, we can assume that this puppy is the "brains" behind the Hunter controller, and contains the code which communicates with the Hydrawise backend systems.
Documentation
Atmel ATWINC1500
The Atmel ATWINC1500-MR210PB is an 802.11 b/g/n "IoT Module", which seems like a fancy way of saying "WiFi module".
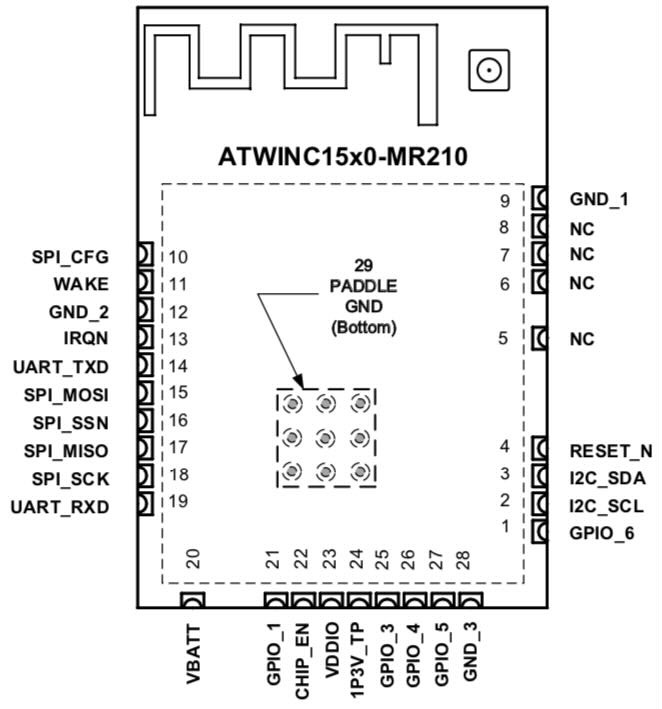
Pinout
Page 7 of the datasheet contains a pin-out diagram which indicates that the module has the following interfaces: UART, SPI, and I2C.
Documentation
- Datasheet
- Wi-Fi Network Controller Software Design Guide
- Wi-Fi Network Controller Software Programming Guide
- Integrated Serial Flash and Memory Download Procedure
- Transport Layer Security (TLS) User's Guide
Pinouts
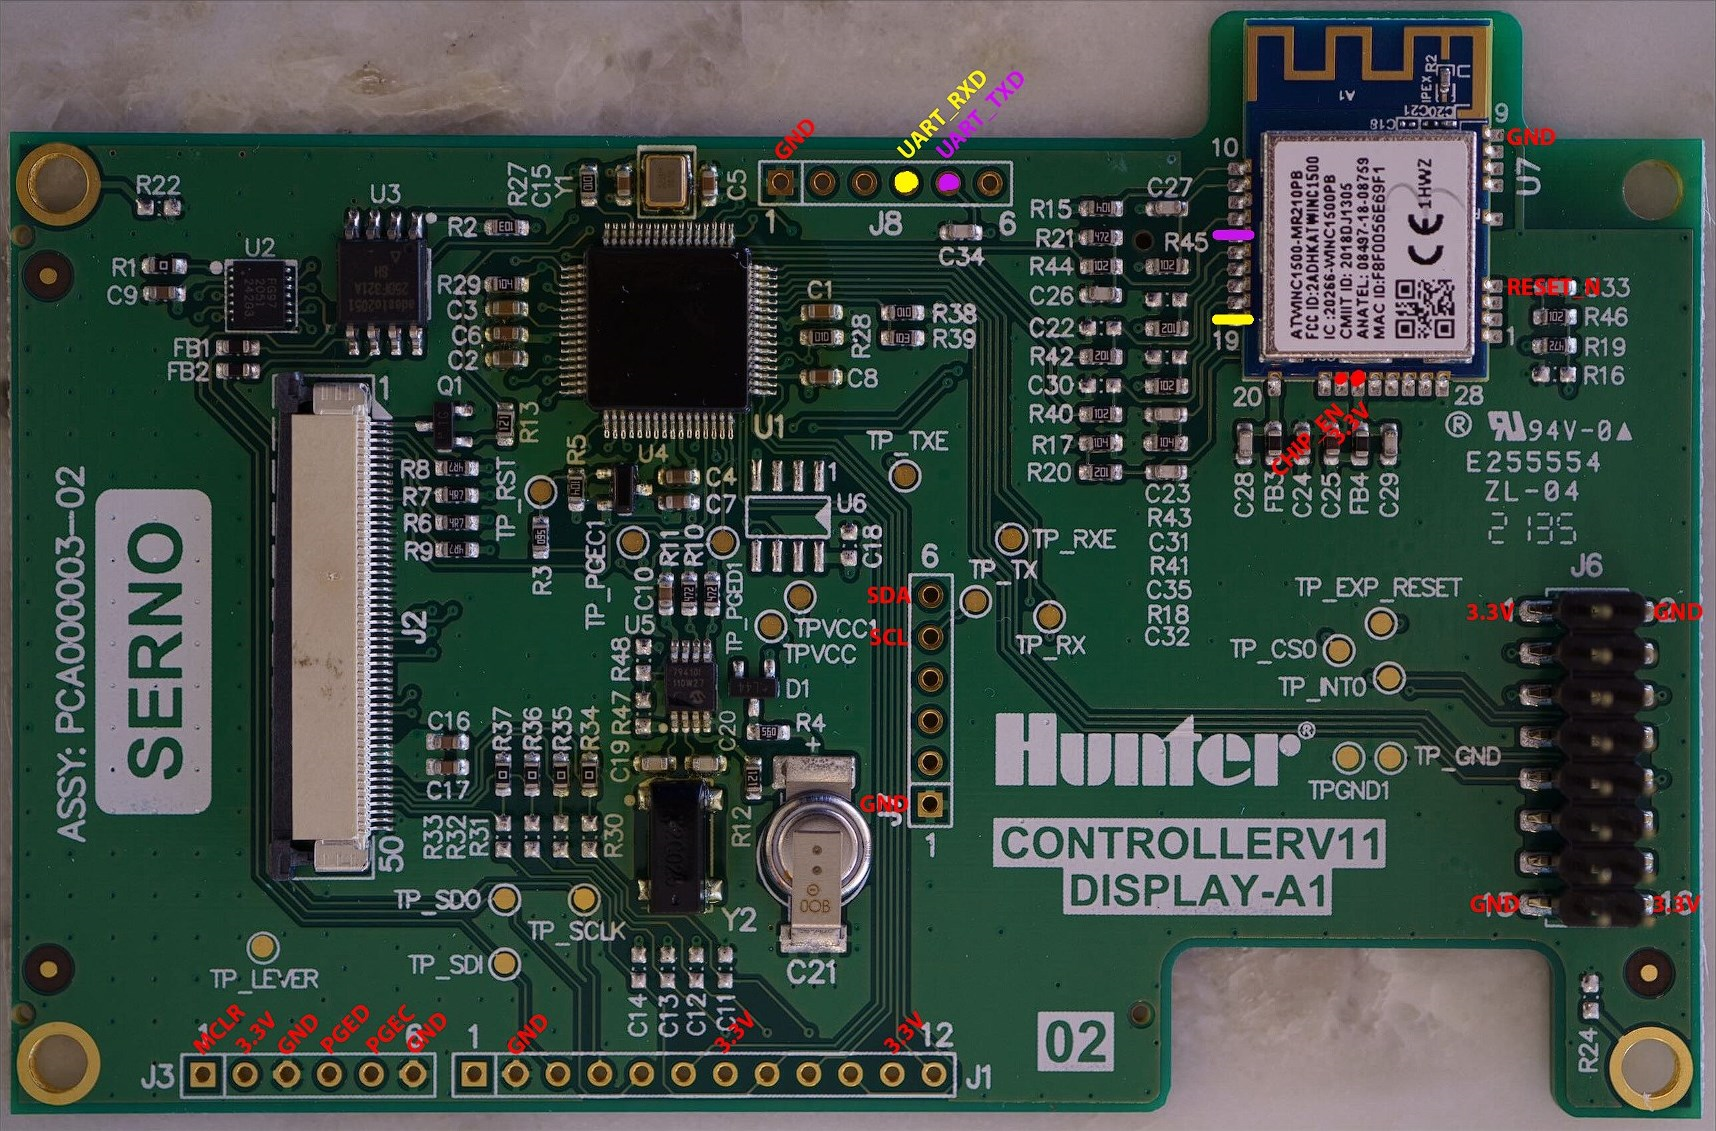
The board has a number of headers, so it seems logical to see what pins are broken out.
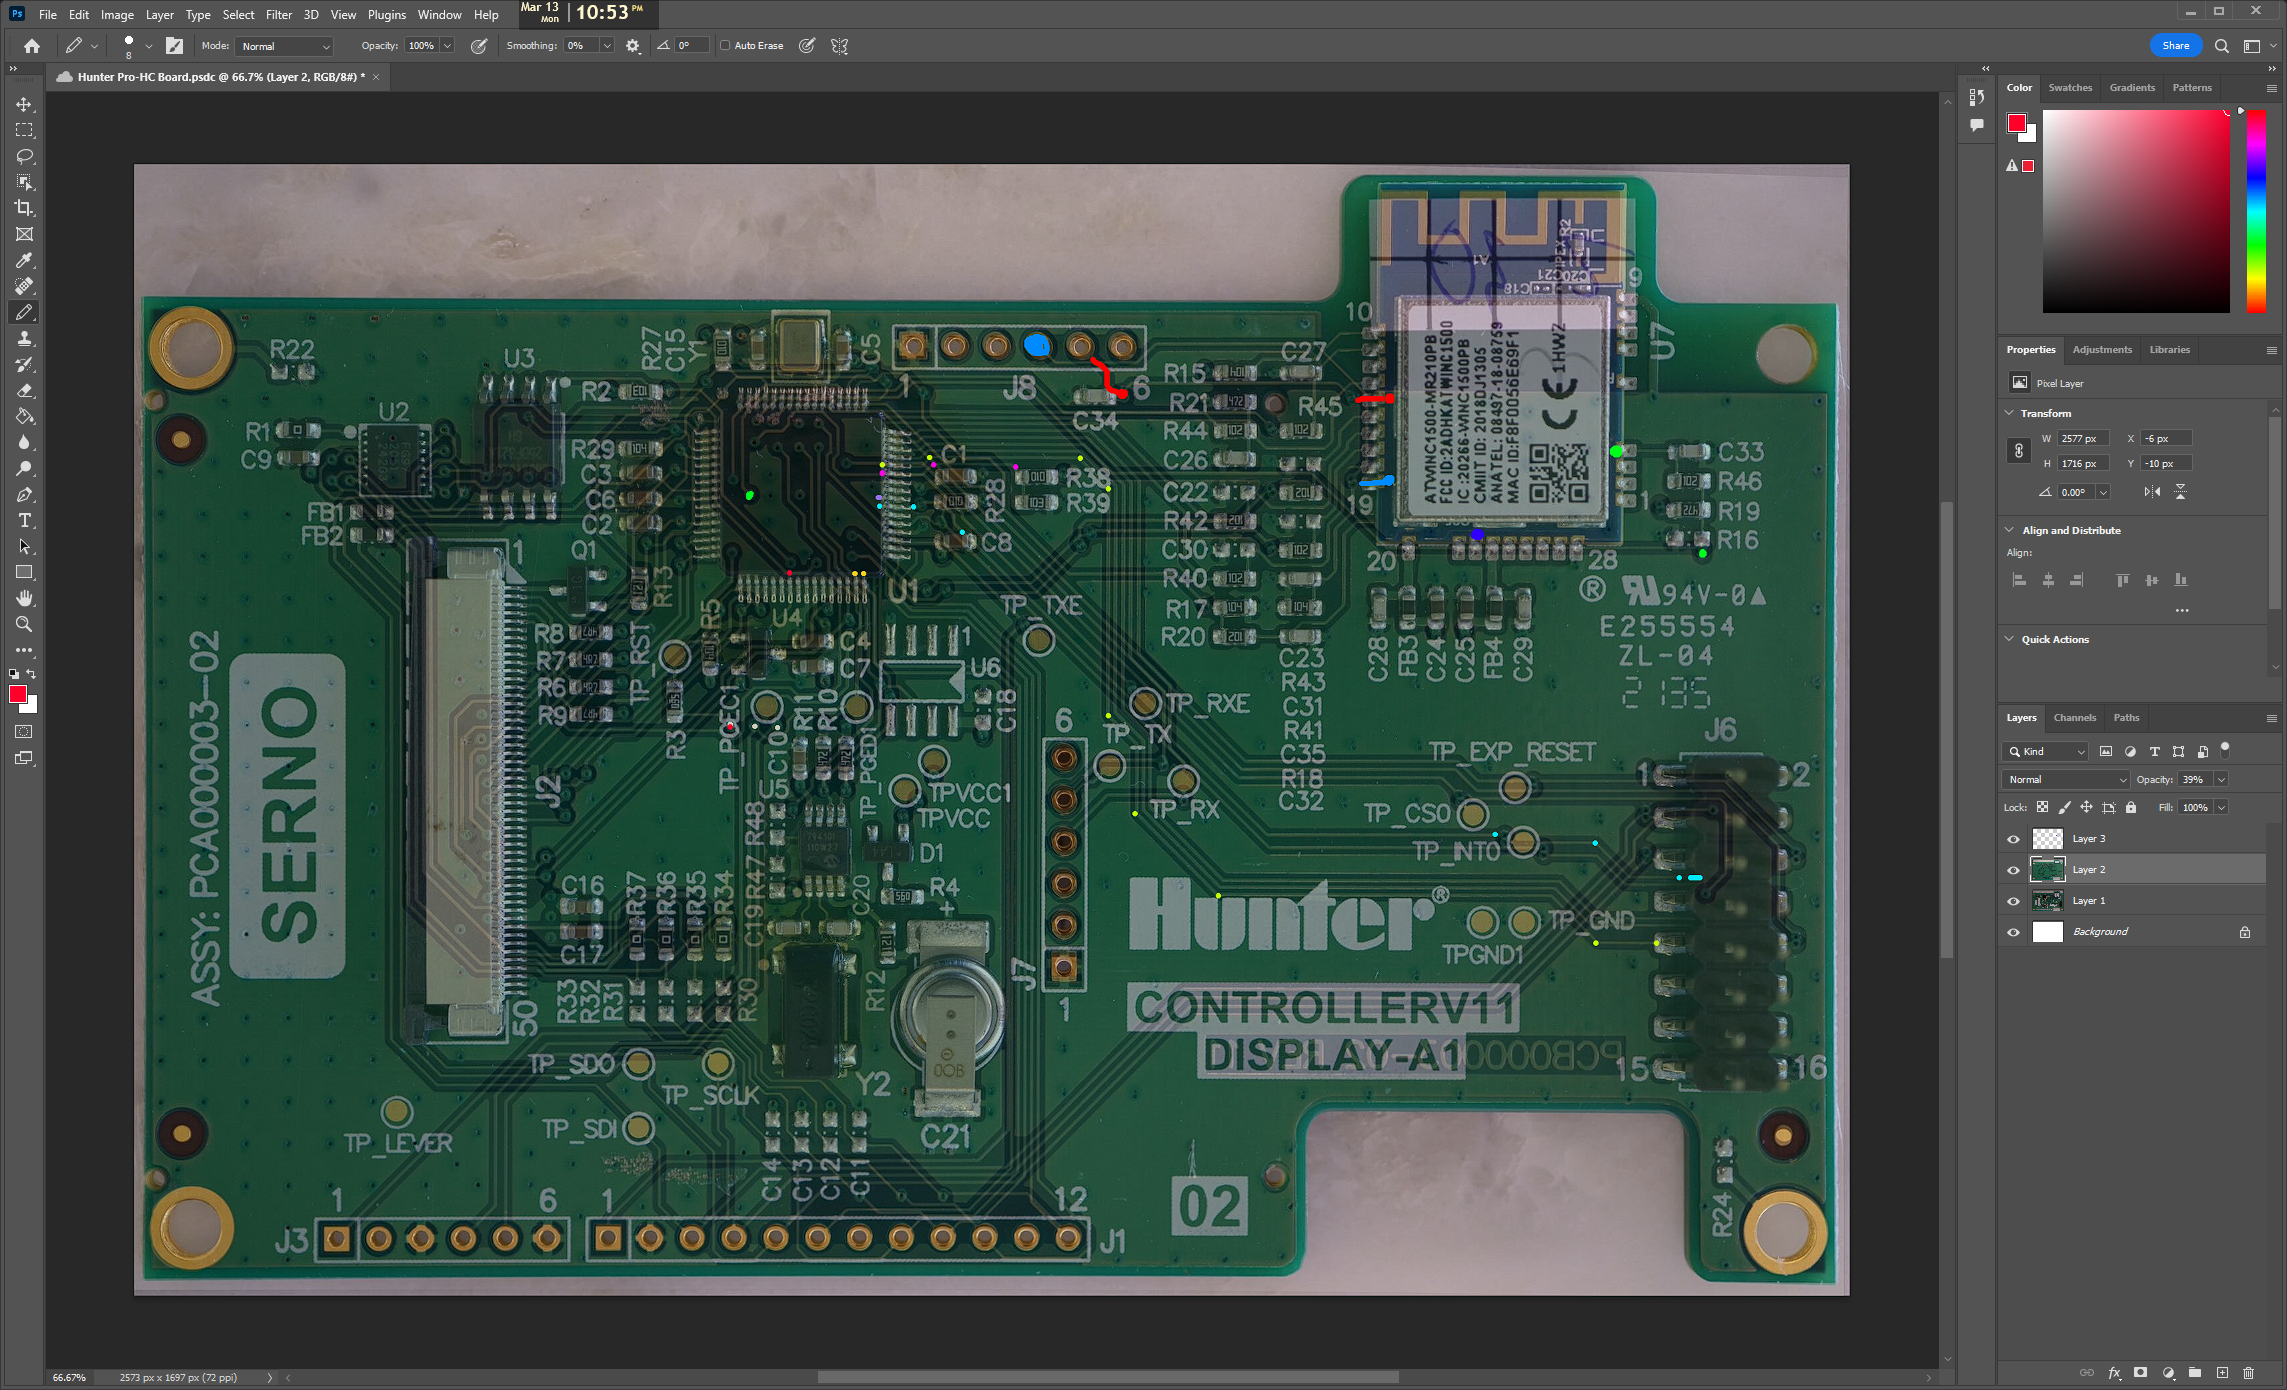
How To Trace
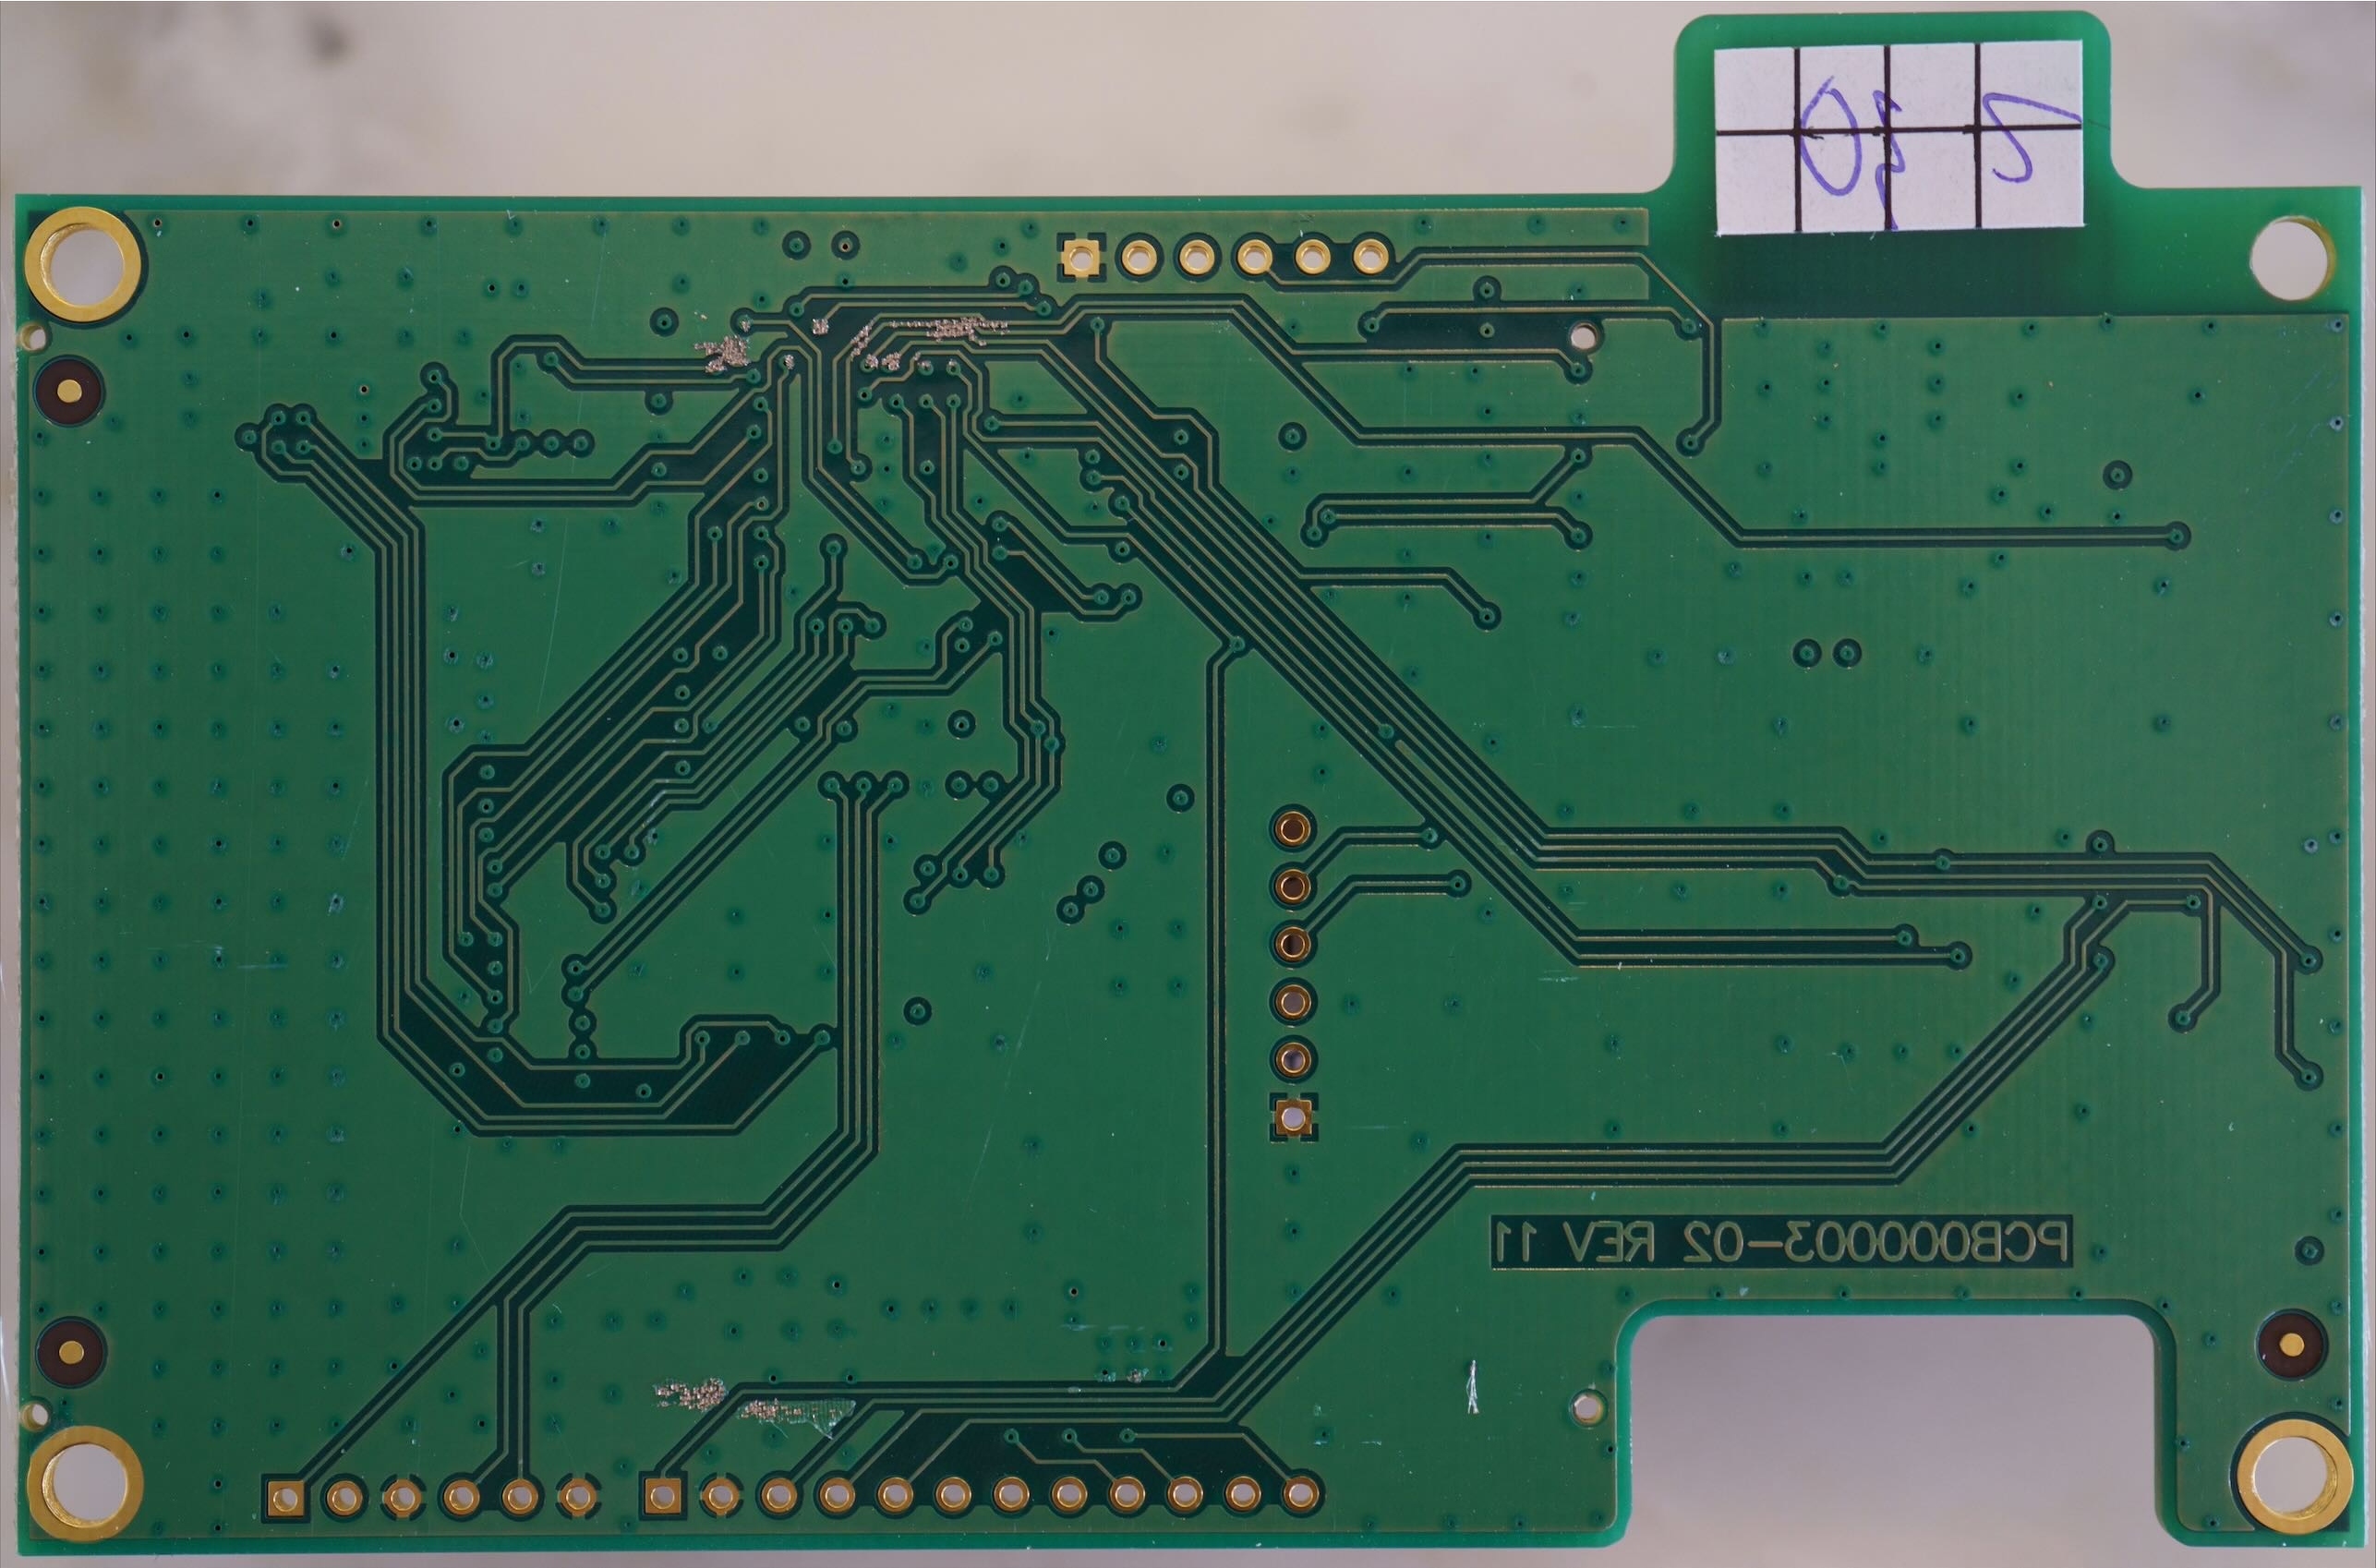
The best technique I’ve found for tracing double-layered boards is to photograph both sides, then line them up carefully in an image editor.
Adjusting opacities and/or toggling layers while carefully tracing with a cursor yields the best results:
Board Outs
Here’s what I discovered:
Taking Stock
From our initial explorations, it does seem possible for us to continue our journey with either the PIC32 or the Atmel WiFI device.
However, revisiting our objective, being able to integrate the device into Home Assistant.
Let's start with Atmel device.
At this point, I figure there are basically two paths forward:
- Exploit the device and replace firmware ala ESPHome
- Extract TLS keys and MitM backend traffic
Let’s continue our investigation and see which option makes the most sense in ATWINC1500 IoT Module Deep-Dive (Part 1).
