ESP32
Helpful Links
ESP32 WROOM32 Module
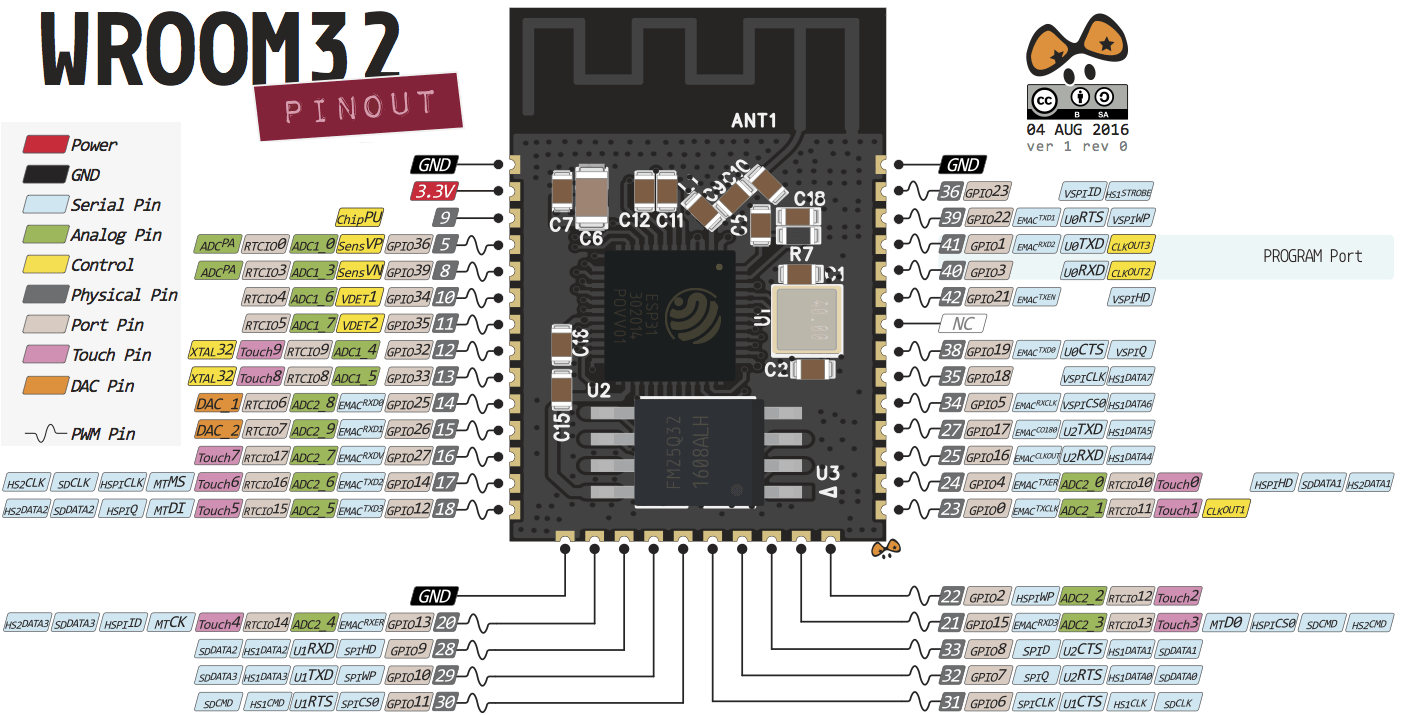
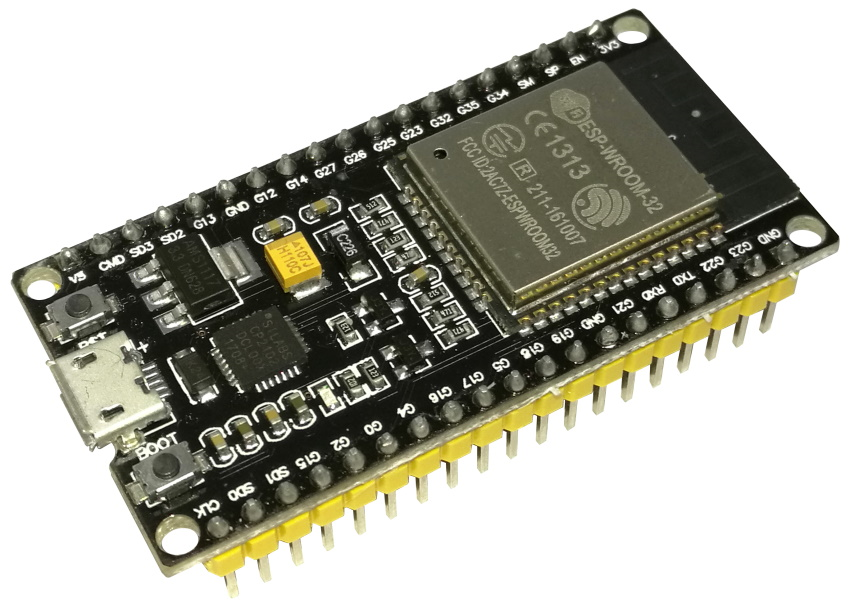
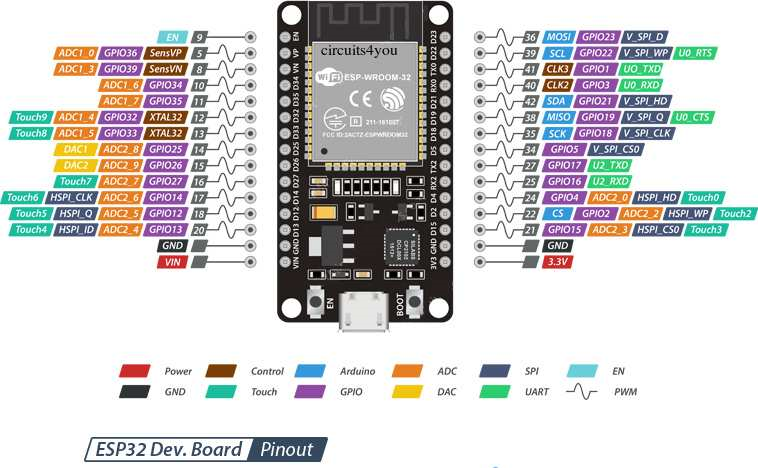
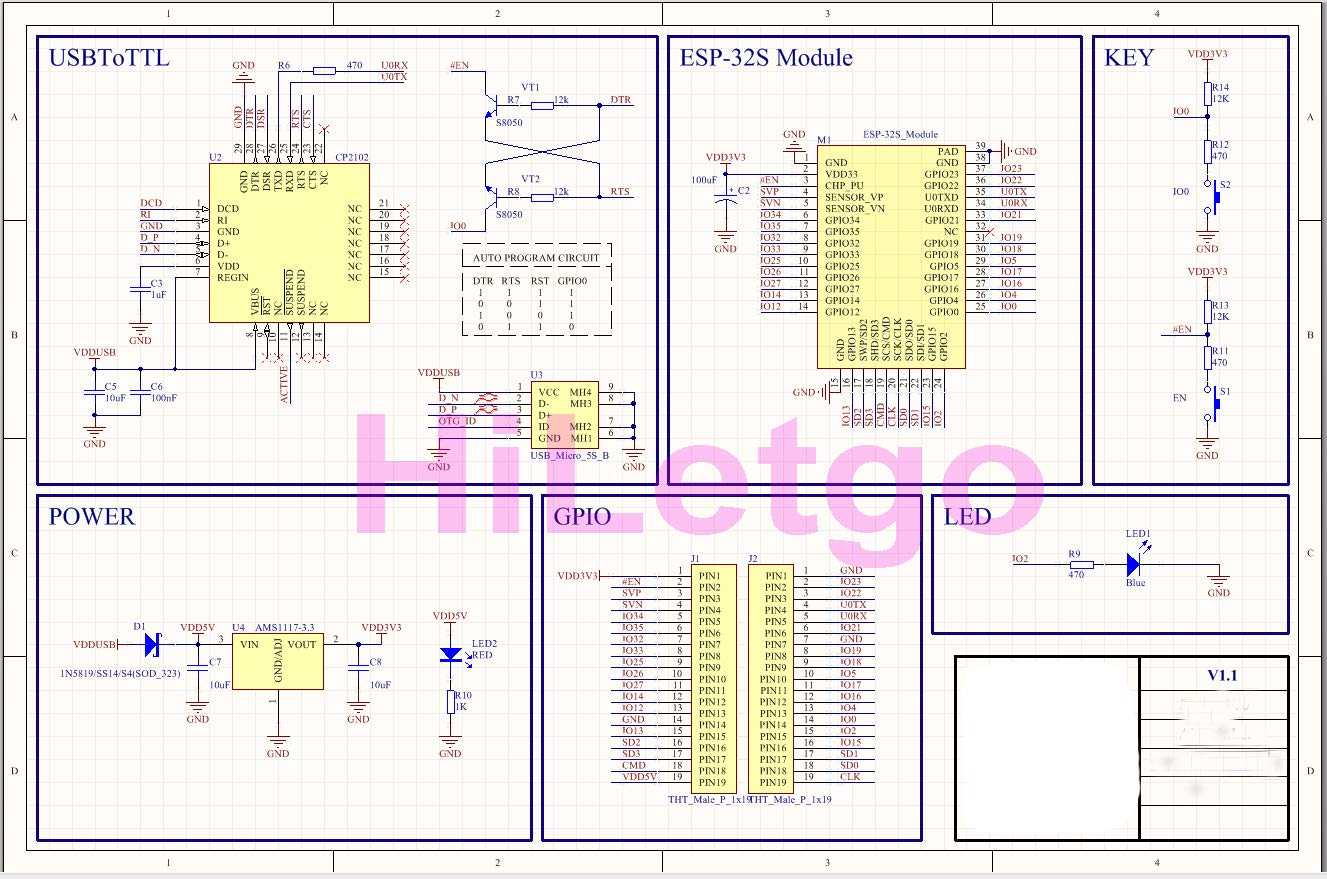
ESP32-WROOM
Pinout
Loading MicroPython
- Download firmware from: https://micropython.org/download/esp32/
- Burn firmware using: https://adafruit.github.io/Adafruit_WebSerial_ESPTool/
- Offset is 0x1000
- Reset board and connect to serial port using Putty
- Type following:
Additional information: https://docs.micropython.org/en/latest/esp32/general.html
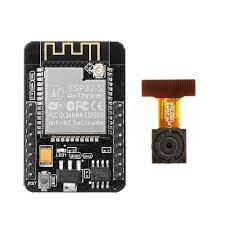
ESP32-CAM
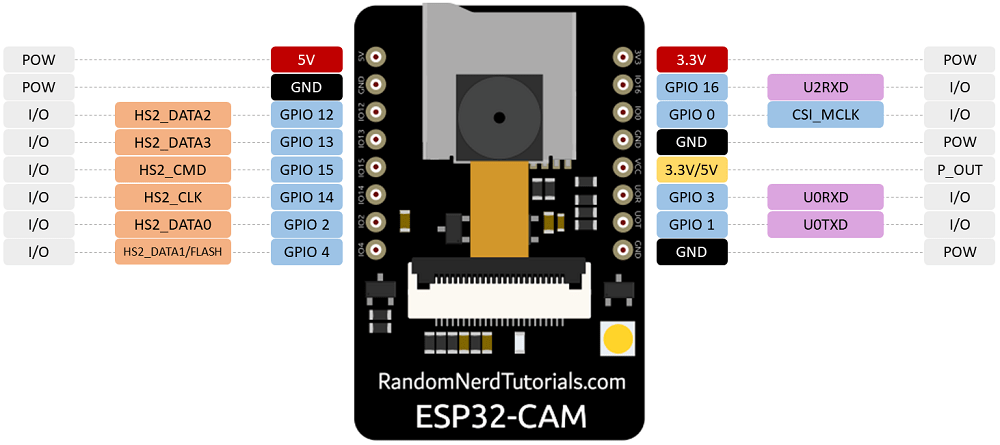
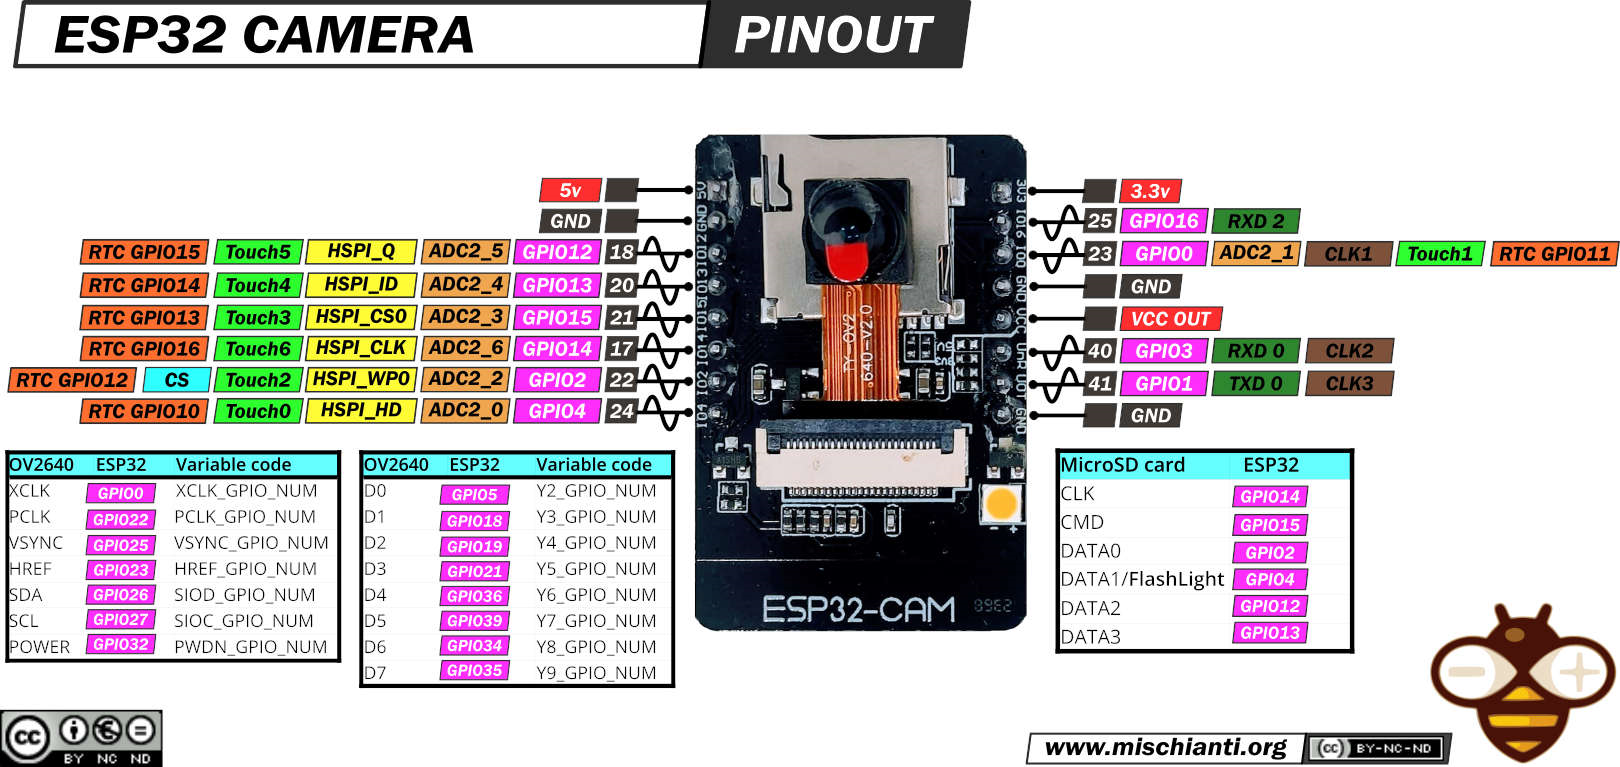
Pinout
Loading MicroPython
- Download firmware from: https://micropython.org/download/esp32/
- Erase flash completely
- Burn firmware using: https://adafruit.github.io/Adafruit_WebSerial_ESPTool/ ○ Offset is 0x1000
- Reset board and connect to serial port using Putty
- Type following:
Loading CircuitPython
- Download firmware from: https://circuitpython.org/board/espressif_esp32_eye/
- Erase flash completely
- Burn firmware using: https://adafruit.github.io/Adafruit_WebSerial_ESPTool/ ○ Offset is 0x0
- Reset board and connect to serial port using Putty
- Type following:
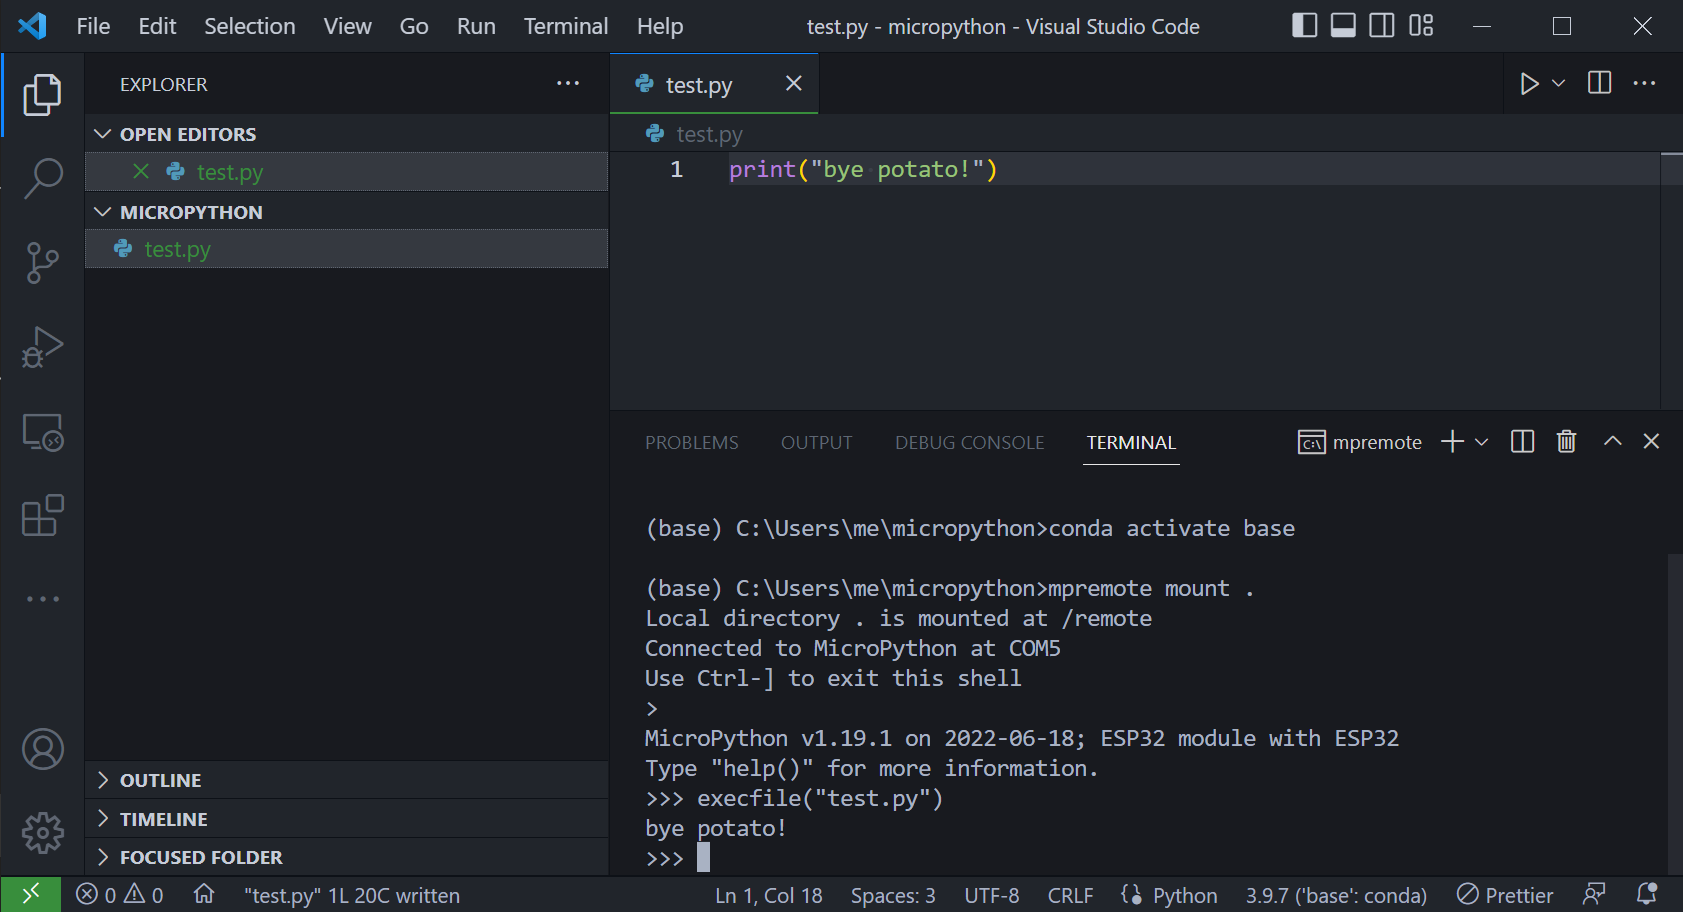
Developing in VSCode
• mpremote mount . • Use 'execfile("filename.py")' to run code
JTAG Debugging
Segger J-Link
Note: See Segger J-Link for additional information.
Software Setup
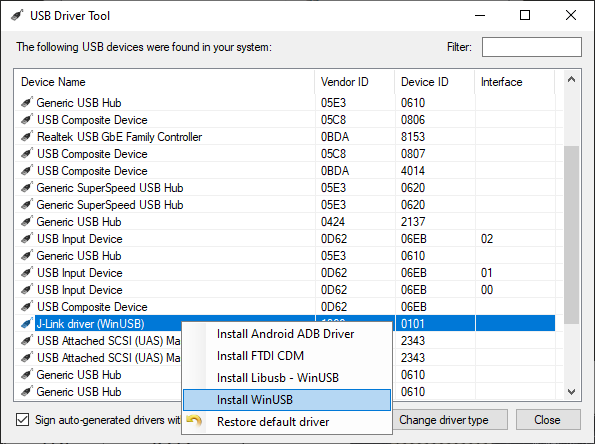
- Download 'USB Driver Tool' from: https://visualgdb.com/UsbDriverTool/
- Change Jlink driver to WinUSB
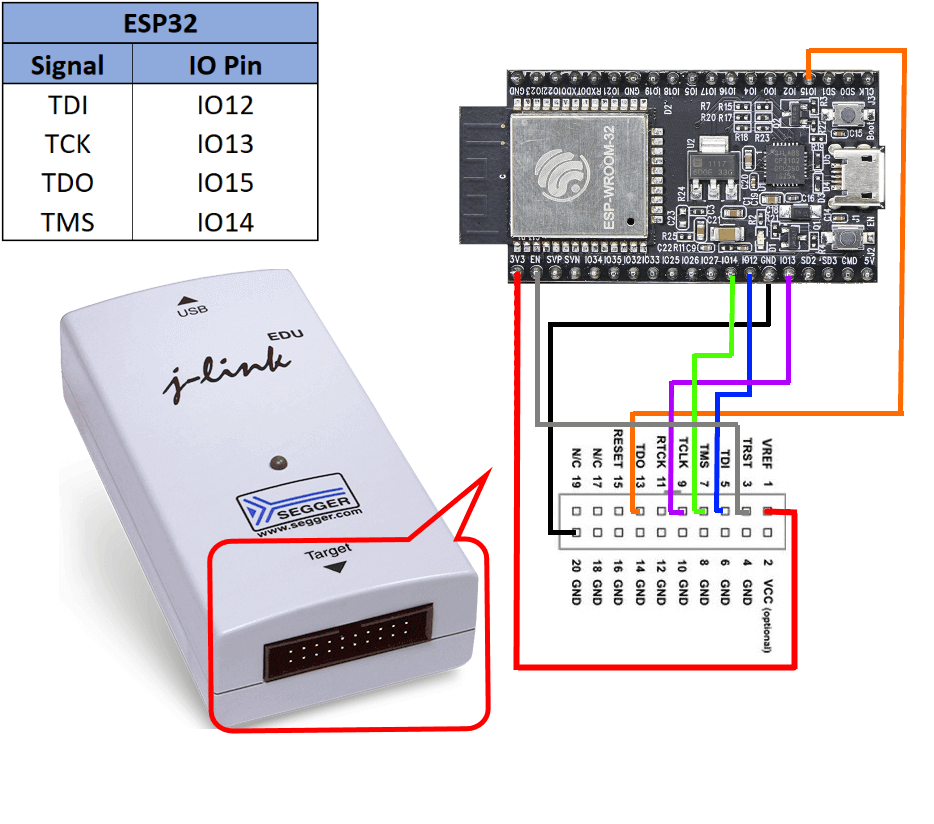
Wiring
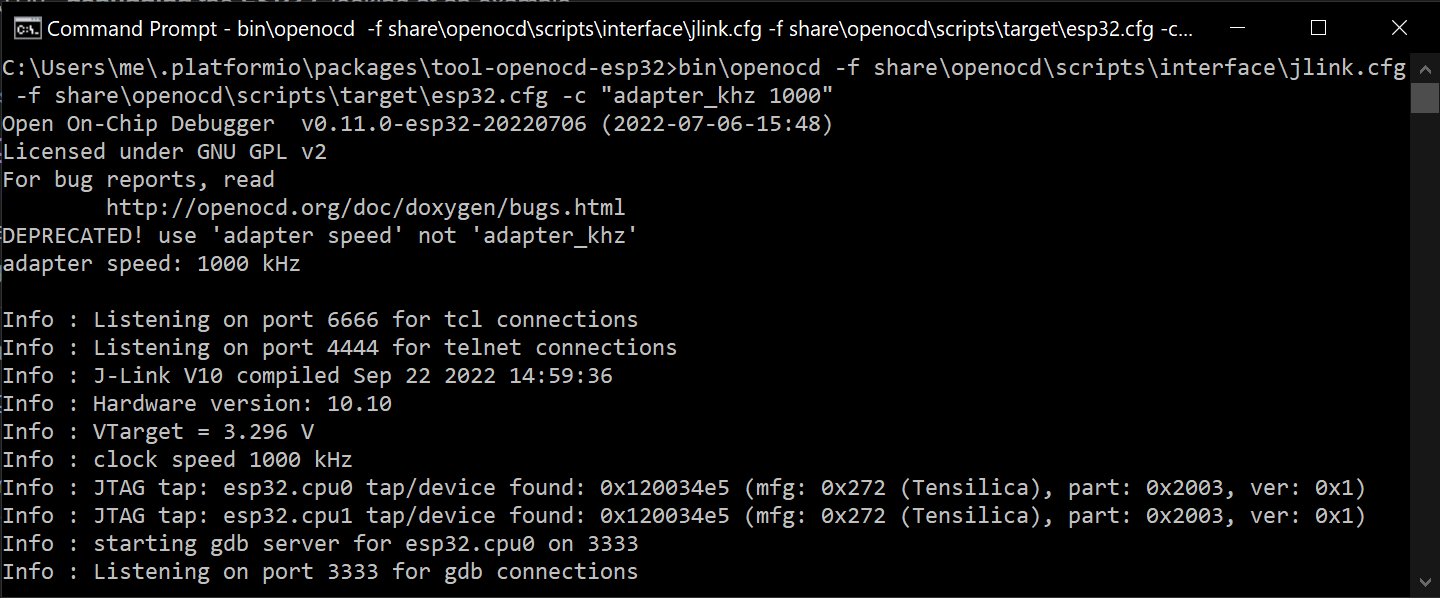
Here's what it looks like when the J-Link is correctly connected:
$ cd C:\...\.platformio\packages\tool-openocd-esp32\bin>
$ openocd -f ..\share\openocd\scripts\interface\jlink.cfg -f ..\share\openocd\scripts\target\esp32.cfg -c "adapter speed 1000"
Arduino-ESP32 Library
Setup
- Install VSCode extension: https://github.com/espressif/vscode-esp-idf-extension/blob/master/docs/tutorial/install.md
- Follow instructions from: Arduino as an ESP-IDF component
Command Line Snippets
OpenOCD
# Setup
cd C:\...\.platformio\packages\tool-openocd-esp32>
bin\openocd -f share\openocd\scripts\interface\jlink.cfg -f share\openocd\scripts\target\esp32.cfg -c "adapter speed 1000"

# Erasing Flash
-c "init; reset halt; flash erase_address 0x1000 4096000; exit"

# Programming Binary
-c "program c:\\...\\esp32-20220618-v1.19.1.bin 0x1000 verify exit"
RShell
In an Anaconda Prompt, type the following: .local/bin/rshell -p /dev/ttyS5 -b 115200
ESPTool
• Flashing Firmware: esptool --chip esp32 --port /dev/ttyUSB0 write_flash -z 0x1000 esp32-idf3-20200902-v1.13.bin
ESP-IDF
Examples
Console
ESP-IDF provides console component, which includes building blocks needed to develop an interactive console over serial port. This component includes following facilities:
- Line editing, provided by linenoise library. This includes handling of backspace and arrow keys, scrolling through command history, command auto-completion, and argument hints.
- Splitting of command line into arguments.
- Argument parsing, provided by argtable3 library. This library includes APIs used for parsing GNU style command line arguments.
- Functions for registration and dispatching of commands.
- Functions to establish a basic REPL (Read-Evaluate-Print-Loop) environment.
From https://docs.espressif.com/projects/esp-idf/en/latest/esp32/api-reference/system/console.html
Arduino Usage
This Arduino library wraps the ESP-IDF console: https://github.com/jbtronics/ESP32Console

