Injecting DLLs With Rust
All right, dear reader. If you've followed along from Part 1 and Part 2, then you know how to:
- Create a Windows dynamic-link library (DLL) using Rust
- Inject DLLs into processes using Process Hacker
- Inject DLLs into processes using Rust
- Create application windows using Rust
- Override a window's behavior using subclassing
In this chapter, we'll tie everything together by injecting hello.dll into a random process using Rust.
DLL Injection
Googling the term "dll injection" results in page after page of bad news; the term is primarily associated with malicious actors.
Wikipedia, however, presents a more neutral description which perfectly encapsulates the spirit in which we'll be approaching the topic:
In computer programming, DLL injection is a technique used for running code within the address space of another process by forcing it to load a dynamic-link library.[1] DLL injection is often used by external programs to influence the behavior of another program in a way its authors did not anticipate or intend. - source
Injection Techniques
Process Injection Techniques presents a good overview of the overall DLL injection landscape.
3 Effective DLL Injection Techniques for Setting API Hooksprovides implementation details for the two technique's that we'll explore together:
- SetWindowsHookEx
- CreateRemoteThread
SetWindowsHookEx
SetWindowsHookEx is a well documented part of the Windows Win32 API, which does what it says...
Enables the installation of "hooks", aka callback functions, at various points in an application, allowing you to intercept or passively sniff system events received by the hooked application.
but wait, there's more!
SetWindowsHookEx can be used to inject a DLL into another process... - source...
So, if you place your callback function in a DLL, the operating system conveniently loads said DLL into the application's address space.
Excellent.
CreateRemoteThread
CreateRemoteThread is a less well documented part of the Windows Win32 API, summarized:
Creates a thread that runs in the virtual address space of another process.
Once a "remote thread" is running in the application's address space, a mere LoadLibrary() call is all that's required to complete the DLL injection.
Further Reading
dll-syringe
The dll-syringe crate provides a convenient wrapper around CreateRemoteThread enabling us to inject DLLs programmatically, using Rust:
use dll_syringe::{Syringe, process::OwnedProcess};

// find target process by name
let target_process = OwnedProcess::find_first_by_name("ExampleProcess").unwrap();

// create a new syringe for the target process
let syringe = Syringe::for_process(target_process);

// inject the payload into the target process
let injected_payload = syringe.inject("injection_payload.dll").unwrap();

// do something else

// eject the payload from the target (optional)
syringe.eject(injected_payload).unwrap();
Further Reading
hello_inject.exe
Let's create a hello_inject crate to take dll-syringe for a whirl:
After updating the workspace Cargo.toml...
And, adding the dependencies to hello.dll and dll-syringe to Cargo.toml:
Do a cargo check:
$ cargo check
   Compiling proc-macro2 v1.0.51
    ...
    Checking dll-syringe v0.15.0
error[E0554]: `#![feature]` may not be used on the stable release channel
 --> C:\Users\me\.cargo\registry\src\github.com-1ecc6299db9ec823\dll-syringe-0.15.0\src\lib.rs:2:1
  |
2 | #![feature(maybe_uninit_uninit_array, maybe_uninit_slice, linked_list_cursors)]
  | ^^^^^^^^^^^^^^^^^^^^^^^^^^^^^^^^^^^^^^^^^^^^^^^^^^^^^^^^^^^^^^^^^^^^^^^^^^^^^^^
...
This error indicates that dll-syringe uses features that haven't yet made it into the stable version of Rust.
To fix this, we need to install the bleeding edge version of rust, Rust Nightly.
Rust Nightly
Rustup installs Rust Nightly in parallel with your existing Rust installation.
To tell cargo to use Rust Nightly, we have to add the +nightly flag to our commands. For example, cargo check becomes cargo +nightly check:
$ cargo +nightly check
    ...
    Checking dll-syringe v0.15.0
    Checking hello_inject v0.1.0 (C:\...\hello_inject)
    Finished dev [unoptimized + debuginfo] target(s) in 22.37s
Of course, this gets annoying fast, so let's set Rust Nightly as default for the rest of this tutorial by using rustup default nightly.
This can be reverted using rustup default stable.
# Set Rust Nightly as default
rustup default nightly

# Update Rust Nightly to today's release
rustup update

# Set Rust Stable as default
rustup default stable
hello_inject.exe (cont.)
Ok, using Rust Nightly do a cargo build, which may throw a few ignorable warnings.
Now update main.rs with the following (taken straight from dll-syringe's README.MD):
use dll_syringe::{Syringe, process::OwnedProcess};
use std::{thread, time};

fn main() {
    // find target process by name
    let target_process =
        OwnedProcess::find_first_by_name("create_window.exe").unwrap();

    // create a new syringe for the target process
    let syringe = Syringe::for_process(target_process);

    // inject the payload into the target process
    let injected_payload = syringe.inject("target\\debug\\hello.dll").unwrap();
    println!("DLL injected successfully!");

    // do something else
    let ten_millis = time::Duration::from_secs(10);

    println!("Sleeping for 10 secs...");
    thread::sleep(ten_millis);

    // eject the payload from the target (optional)
    syringe.eject(injected_payload).unwrap();
}
Fire up create_window with a:
Open up another terminal and type:
$ cargo run --bin hello_inject
   ...
   Compiling dll-syringe v0.15.0
   Compiling hello_inject v0.1.0 (C:\...\hello_inject)
    Finished dev [unoptimized + debuginfo] target(s) in 35.35s
     Running `target\debug\hello_inject.exe`
DLL injected successfully!
Sleeping for 30 secs...
It works!
Identifying Targets
We are currently using find_first_by_name() to identify our injection target process.
This works great for simple apps, like Notepad, but what if we want to target Chrome, famous for spawning each tab in a separate process:
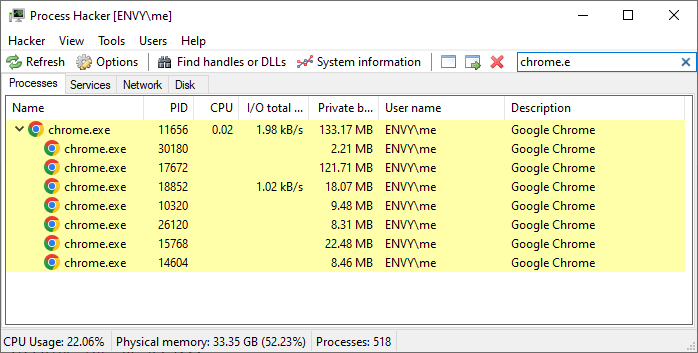
Luckily, OwnedProcess:: also provides the from_pid() method, so if we can figure out a window's process identifier (pid), we can target it.
By Window Handle
It would be useful if we could specify targets by their window handle, since this is something we can easily identify using Window Detective:

If you recall, we used GetWindowThreadProcessId() in hello.dll, as part of the enum_window_callback().
Using that code as a reference, we can write a find_pid_by_hwnd():
fn find_pid_by_hwnd(hwnd: u32) -> u32 {
    let mut pid = MaybeUninit::<u32>::zeroed();
    unsafe {
        GetWindowThreadProcessId(HWND(hwnd as isize), Some(pid.as_mut_ptr()));
        return pid.assume_init();
    };
}
And use it like:
// find target process window handle
let pid = find_pid_by_hwnd(HWND(0x00401B32));
let target_process = OwnedProcess::from_pid(pid).unwrap();
By Window Title
Many of the windows we want to target have window titles, for example, "Untitled - Notepad":

Leveraging find_pid_by_hwnd() and FindWindowA we can write find_pid_by_title():
pub fn find_pid_by_title(title: PCSTR) -> u32 {
    let hwnd = unsafe {
        FindWindowA(None, title)
    };

    return find_pid_by_hwnd(hwnd);
}
And use it like:
// find target process by window title
let pid = find_pid_by_title(s!("New Tab - Google Chrome"));
let target_process = OwnedProcess::from_pid(pid).unwrap();
Handling Bitness
The majority of us are running 64-bit Windows on 64-bit processors, however, we still use a surprising number of 32-bit applications.
Process Interoperability explains why this matters to us:
On 64-bit Windows, a 64-bit process cannot load a 32-bit dynamic-link library (DLL). Additionally, a 32-bit process cannot load a 64-bit DLL.
Which means that:
- we need to build both 32-bit and 64-bit versions of
hello.dll - we need to detect whether a process is 32-bit or 64-bit and inject the appropriate build of
hello.dll
Build Targets
Rust makes it easy to generate multiple build targets for a crate or an entire workspace.
First, you have to add the 32-bit toolchain:
Then, you specify which target to build using:
# Build 32-bit binaries
cargo build --target=i686-pc-windows-msvc

# Build 64-bit binaries
cargo build --target=x86_64-pc-windows-msvc
Nice, but cumbersome.
Since we only want multiple builds of hello.dll, we can add a [build] target to its Cargo.toml to specify that:
Now when we hit cargo build, we get two new folders in our target directory:
 $ tree -L 2 -a|more
.
├── debug
│   ├── create_window.exe
│   ├── hello.dll
│   ├── hello_inject.exe
│   ├── hello_runner.exe
|  ...
├── i686-pc-windows-msvc
│   └── debug
└── x86_64-pc-windows-msvc
    └── debug
The first containing 32-bit binaries and the latter containing 64-bit binaries.
Detecting Process Bitness
This one is easy, dll-syringe provides the OwnedProcess::is_x64() and OwnedProcess::is_x86() methods which let us identify which is which.
Picking is_x64(), we can write:
let dll_path = {
    if OwnedProcess::is_x64(&target_process).unwrap() {
        "target\\x86_64-pc-windows-msvc\\debug\\hello.dll"
    } else {
        "target\\i686-pc-windows-msvc\\debug\\hello.dll"
    }
};
...
let injected_payload = syringe.inject(dll_path).expect("Architecture mismatch!");
Implementing Interopablity
Now, if you'd done a cargo build, a few moments earlier, you'd have been greeted with a bunch of "mismatched types" errors, like:
$ cargo build
   Compiling hello v0.1.0 (C:\Users\me\source\blog_qa\hello)
error[E0308]: mismatched types
--> hello\src\lib.rs:38:70
|
| let result = SetWindowLongPtrW(handle, GWLP_WNDPROC, wnd_proc as isize);
|              -----------------                       ^^^^^^^^^^^^^^^^^
               |                                        expected `i32`, found `isize`
|              |
|              arguments to this function are incorrect
...
And:
error[E0308]: mismatched types
--> hello\src\lib.rs:39:60
|
| PREV_WNDPROC = transmute::<isize, WNDPROC>(result);
|                --------------------------- ^^^^^^ expected `isize`, found `i32`
|                |
|                arguments to this function are incorrect
...
With the rustc providing advice like:
help: you can convert an `i32` to an `isize` and panic if the ... value doesn't fit
|
| PREV_WNDPROC = transmute::<isize, WNDPROC>(result.try_into().unwrap());
|                                                  ++++++++++++++++++++
Why is this happening?
The Problem
Well, throughout this series, we've been writing fairly idiomatic Rust, trying to make sure we dot our t's and cross our i's.
For example, when writing:
rust-analyzer screamed:
error[E0308]: mismatched types
--> hello\src\lib.rs:38:70
|
| let result = SetWindowLongPtrW(hwnd, GWLP_WNDPROC, wnd_proc);
|              -----------------                     ^^^^^^^^
|              |                                     expected `isize`, found fn item
|              |
|              arguments to this function are incorrect
...
Cajoling us into explicitly casting wnd_proc as isize, as directed.
However, rust-analyzer generates suggestions based on the currently configured toolchain, which in my case (and probably yours) is 64-bit.
Under the hood, windows-rs is doing this:
#[cfg(target_pointer_width = "32")]
#[cfg(feature = "Win32_Foundation")]
pub use SetWindowLongW as SetWindowLongPtrW;
The #cfg[...] stuff is called Conditional compilation, the Rust version of #ifdef...
... which means that SetWindowLongPtrW is swapped out for SetWindowLongW when compiling for a 32-bit target.
But since you've read the documentation, you already saw this:
Note
Note To write code that is compatible with both 32-bit and 64-bit versions of Windows, use SetWindowLongPtr. When compiling for 32-bit Windows, SetWindowLongPtr is defined as a call to the SetWindowLong function.
#[doc = "*Required features: ..."]
#[cfg(any(target_arch = "aarch64", target_arch = "x86_64"))]
#[cfg(feature = "Win32_Foundation")]
#[inline]
pub unsafe fn SetWindowLongPtrW<P0>(hwnd: P0, nindex: ..., dwnewlong: isize) -> isize
where
    P0: ::std::convert::Into<super::super::Foundation::HWND>,
{
    ::windows::core::link ! ( "user32.dll""system" fn SetWindowLongPtrW (
        hwnd : super::super::Foundation:: HWND ,
        nindex : WINDOW_LONG_PTR_INDEX ,
        dwnewlong : isize
        ) -> isize
    );
    SetWindowLongPtrW(hwnd.into(), nindex, dwnewlong)
}

#[doc = *Required features: ..."]
#[cfg(feature = "Win32_Foundation")]
#[inline]
pub unsafe fn SetWindowLongW<P0>(hwnd: P0, nindex: ..., dwnewlong: i32) -> i32
where
    P0: ::std::convert::Into<super::super::Foundation::HWND>,
{
    ::windows::core::link ! ( "user32.dll""system" fn SetWindowLongW (
        hwnd : super::super::Foundation:: HWND ,
        nindex : WINDOW_LONG_PTR_INDEX ,
        dwnewlong : i32
        ) -> i32
    );
    SetWindowLongW(hwnd.into(), nindex, dwnewlong)
}
Since SetWindowLongPtrW uses isize and SetWindowLongW uses i32, we get the type mismatch errors above.
Solution(s)
There are two ways to fix our issue:
Custom Type
We can define a custom type using a #[cfg(any(target_arch = "aarch64", target_arch = "x86_64"))] macro to toggle it between isize and i32, like this:
// Work around a difference between the SetWindowLongPtrW API definition
// in windows-rs on 32-bit and 64-bit Windows.
#[cfg(any(target_arch = "x86_64", target_arch = "aarch64"))]
type LongPtr = isize;
#[cfg(not(any(target_arch = "x86_64", target_arch = "aarch64")))]
type LongPtr = i32;
Replacing all isize references with LongPtr, or whatever you name your custom type, for example:
Type Inference
Alternatively, we can use Rust's powerful type inference abilities, which allows rustc to infer the destination type based on contextual clues:
Here, the as _ indicates our type inference request, which rustc can easily do by referencing its signature from ...\WindowsAndMessaging\mod.rs.
Here's another example where inference works:
Bring It Home
Go ahead and use type inference to fix each compile error and make sure workspace compiles with both a cargo build --target=i686-pc-windows-msvc and a cargo build --target=x86_64-pc-windows-msvc.
Further Reading
- Running 32-bit Applications explains how Windows does this using something called WOW64.
The Moment Of Truth
We are finally ready to see if our project works with both 32-bit and 64-bit applications.
Testing 32-bit Applications
If you have a 32-bit application in mind, go ahead and use it.
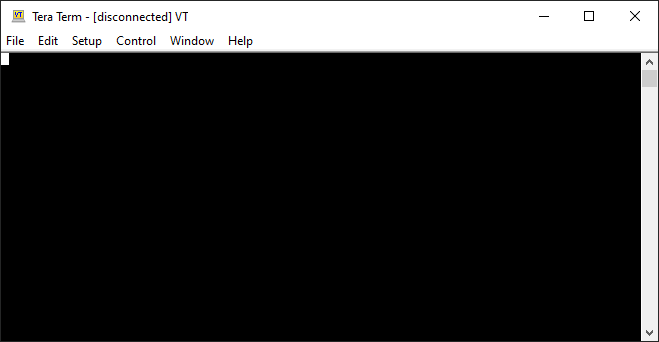
If you need a recommendation, Tera Term is a hand 32-bit application, you can grab a copy here.
It looks like:
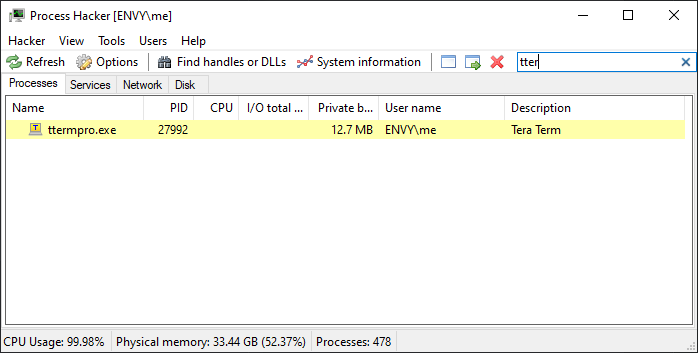
It's a single process application, so you can use find_first_by_name() to grab it in hello_inject:
Here's what my main.rs looks like:
use dll_syringe::{Syringe, process::*};
use windows::{Win32::{UI::WindowsAndMessaging::{GetWindowThreadProcessId, FindWindowA}, Foundation::HWND}, core::PCSTR, s};
use std::{thread, time, borrow::BorrowMut, mem::MaybeUninit};

fn main() {
    // find target process by .exe
    let target_process =
        OwnedProcess::find_first_by_name("ttermpro.exe").expect("Couldn't find process, exiting!");

   let dll_path = {
        if OwnedProcess::is_x64(&target_process).unwrap() {
            "target\\x86_64-pc-windows-msvc\\debug\\hello.dll"
        } else {
            "target\\i686-pc-windows-msvc\\debug\\hello.dll"
        }
    };

    // create a new syringe for the target process
    let syringe = Syringe::for_process(target_process);

    let injected_payload = syringe.inject(dll_path).expect("Architecture mismatch!");
    println!("DLL injected successfully!");

    // do something else
    let ten_millis = time::Duration::from_secs(30);

    println!("Sleeping for 30 secs...");
    thread::sleep(ten_millis);

    // eject the payload from the target (optional)
    syringe.eject(injected_payload).unwrap();
}

fn find_pid_by_hwnd(hwnd: HWND) -> u32 {
    let mut pid = MaybeUninit::<u32>::zeroed();
    unsafe {
        GetWindowThreadProcessId(hwnd, Some(pid.as_mut_ptr()));
        return pid.assume_init();
    };
}

pub fn find_pid_by_title(title: PCSTR) -> u32 {
    let hwnd = unsafe {
        FindWindowA(None, title)
    };

    return find_pid_by_hwnd(hwnd);
}
Doing a cargo run --bin hello_inject should result in:
$ cargo run --bin hello_inject
    Finished dev [unoptimized + debuginfo] target(s) in 0.47s
     Running `target\x86_64-pc-windows-msvc\debug\hello_inject.exe`
DLL injected successfully!
Sleeping for 30 secs...
Part 4 is here: Production Ready DLL Injection.
Having trouble? The code this series can be found here: peddamat/how-to-create-a-dll-using-rust